PART II: The Space Scene
Step 10: Star Field open online photoshop
Back to homepage

The first thing we need to create is a star field that will sit behind our planets, sun, asteroids, and other stuff in our image. We are actually going to create 4 different levels of stars to give our space scene a feeling of depth and make it look awesome.

Just a word of warning before we begin:
This Step, and many that follow, are longer and more involved than most of the previous Steps, so if you need to save as you are working I recommend that you name your image with an extra number at the end. For example, if you need to spot working on this Step and save before you finish you should name it Space10-1, then Space10-2, then Space10-3, and so on. Remember that the file you save at the end of this Step needs to be named just Space10.

FOLLOW THE DIRECTIONS BELOW CAREFULLY!

  1. Open your Space09 file in ToolPic
  2. Let's start by making sure we are using solid black as our Foreground color - Press D on the keyboard - this is the keyboard shortcut to reset the Foreground and Background colors to their default colors (black and white)
  3. Use the Paint Bucket Tool to fill the Background with black
  4. Lock the Background layer as we will not be editing it at all during this step but leaving it in the background so we always have some black to see our stars
  5. At the bottom of the Layers panel, click the Create a new layer button...

Right about now you may be wondering 'how do I take notes on what that button looks like?,' and that's actually a good question. You can do it any way you want, but an easy way is to draw a quick picture or simply describe where the button is at, such as 'on the Layers panel, second button from the right at the bottom.'

  1. Double-click the new layer's name to select the name and rename the layer Far Stars - you should now have the following layers...
  2. Press Alt+Backspace to fill the Far Stars layer with black (this is the keyboard shortcut to fill the current selection with the foreground color - I know, cool huh?)
  3. Press Ctrl+1 (the Ctrl key and the 1 key) on the keyboard to set the Zoom level to 100%

There are several different ways to zoom in ToolPic. While Ctrl+1 sets the zoom level to 100%, Ctrl+0 sets the zoom level to whatever makes the entire image visible in the window. Additionally, you can use Ctrl++ (Ctrl and the + key) to increase the zoom level and Ctrl+- (Ctrl and the - key) to decrease the zoom level. You can also press and hold the Alt key and roll the mouse wheel up to zoom in and down to zoom out. Finally, you can click the Zoom tool and use the Plus and Minus options on the Zoom tool's options bar and click on your image to increase and decrease the zoom level respectively (you can also click and drag on your image to the right to zoom in and to the left to zoom out). Feel free to experiment with the various zoom methods until you find one that you like to use best.

  1. Click Filter then point at Noise and click Add Noise...

    The Add Noise window appears...

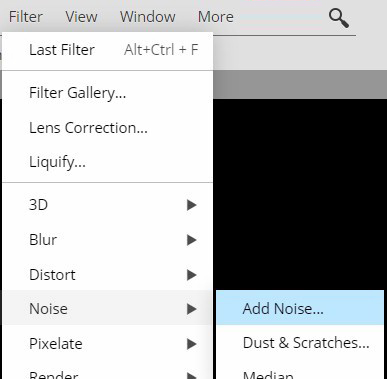
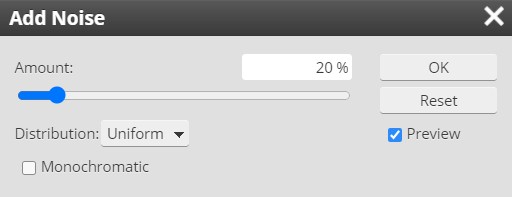
Just a quick point here: don't be alarmed if ToolPic reacts slowly while using the Add Noise filter. Remember that you are working with a piece of online software and when it does things like apply a random image filter such as Add Noise it may temporarily slow down. Be patient and give the software time to work.

  1. Make your settings match the image below...

    Remember that these settings are not set in stone - you can adjust them to whatever you like when you are working with your own images in the future, but for now let's all use these settings as they will allow us to create quick, simple stars
    NOTE: Make certain that you have Monochromatic checked. If Monochromatic (which simply means we are working with a variation of one color, in this case white) is unchecked we will get a field of noise that includes red, yellow, blue, purple, and other colors...

    This will create unrealistic multi-colored stars and destroy the illusion of our amazing space scene

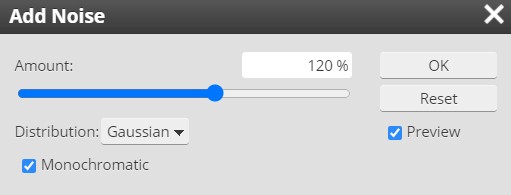
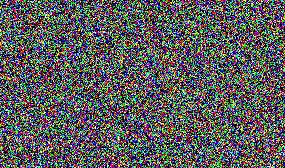
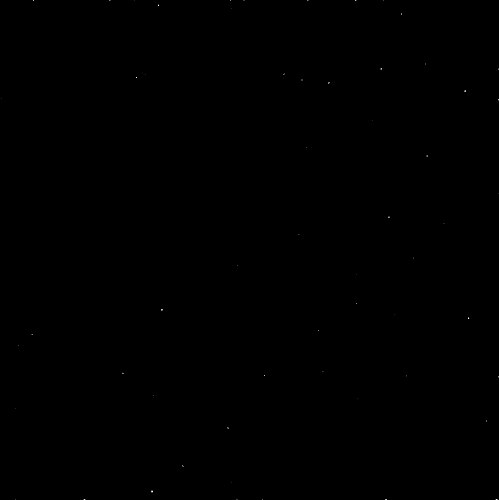
When ToolPic applies the Noise filter it generates a random noise pattern. In other words, everyone will have a different noise pattern and thus will have a unique layout of stars.

  1. Click OK - you should have a random pattern of dots...
We need to duplicate the Far Stars layer at this point so that we can simulate some stars that are nearer to us and brighter.
  1. Right-click the Far Stars layers and click Duplicate Layer...
  2. Rename the new layer to Near Stars
  3. Lock the Near Stars layer then turn its visibility off - you should now have the following layers...

    We will work on our Far Stars layer first and come back to the Near Stars layer a little later on
  4. Make the Far Stars layer the active layer - it should be highlighted in gray...

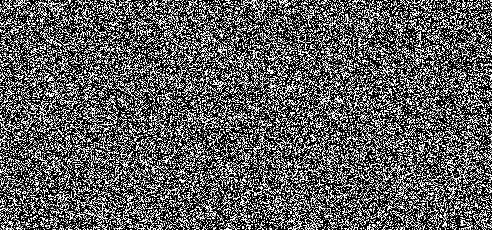
The 'stars' we are making are very sharp and crisp at this point, so let's soften them up a little to help them look like they are actually glowing balls of gas.

  1. Click Filter then point at Blur and click Gaussian Blur...

    This will open the Gaussian Blur window...

    Gaussian Blur tends to make images appear softer or slightly out of focus
  2. Make your settings match the image below...
  3. Click OK

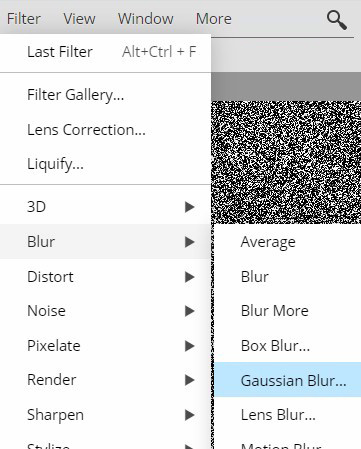
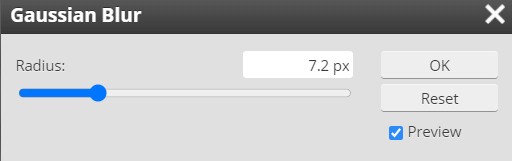
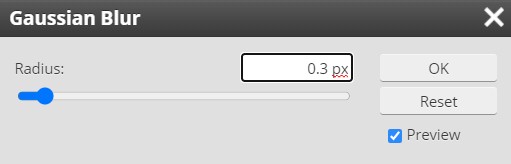
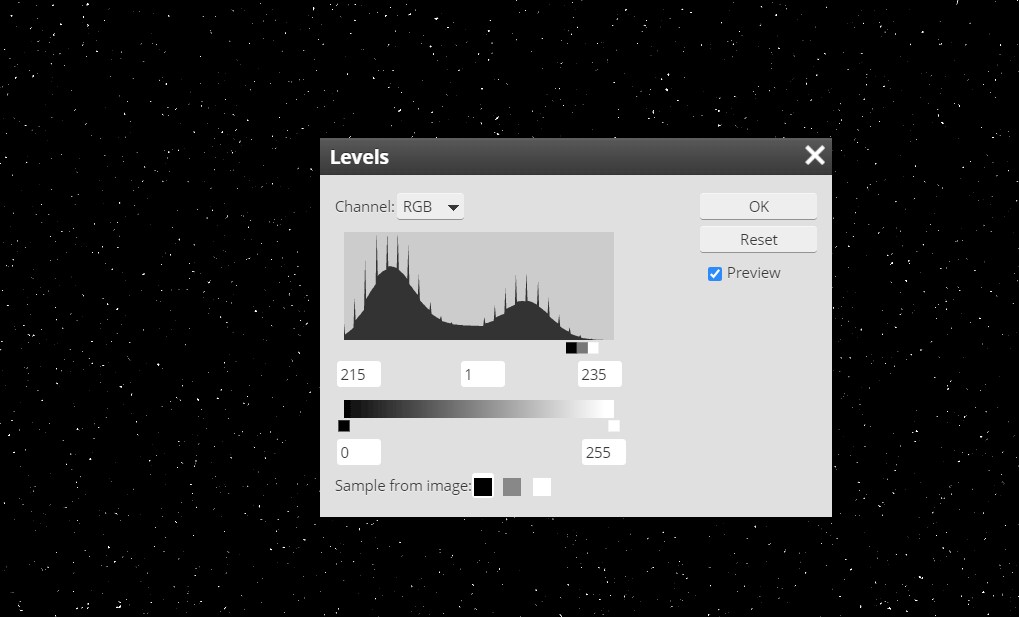
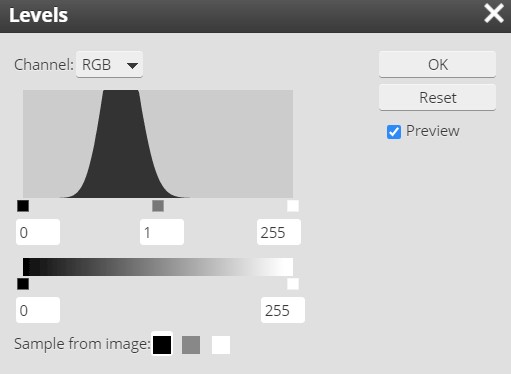
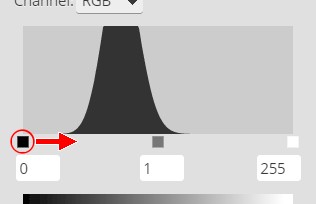
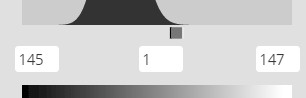
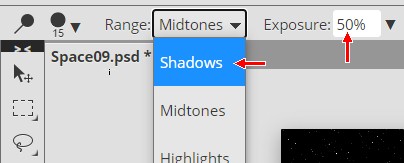
To turn this static into stars, we are going to use the Levels editor - yes, the same one we used when we turned our face blue - to remove most of the white and be left with a random spattering of dots which will be our stars.

  1. Click Image then point at Adjustments and then click Levels
  2. Click the black Input Level slider (red arrow below)...

    and drag it slowly to the right (the gray slider will move to the right automatically) - notice as you drag that the noise starts to go away - stop dragging at around 215
  3. Click the white Input Level slider (the one on the right) and drag it slowly to the left - notice as you drag that the stars become brighter and more refined - stop dragging around 235 - you should now have this...

    Yes, the three sliders are really close together

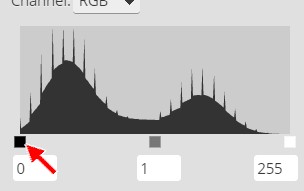
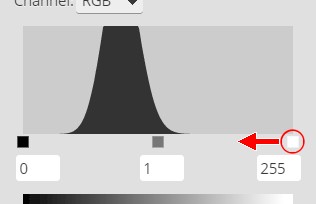
By the way, if your histogram looks like this...

Congratulations, you did it WRONG.
Click Cancel and go back to direction 16 above.

  1. Click OK
  2. Press Ctrl+1 on the keyboard - your current star field should look something like this...

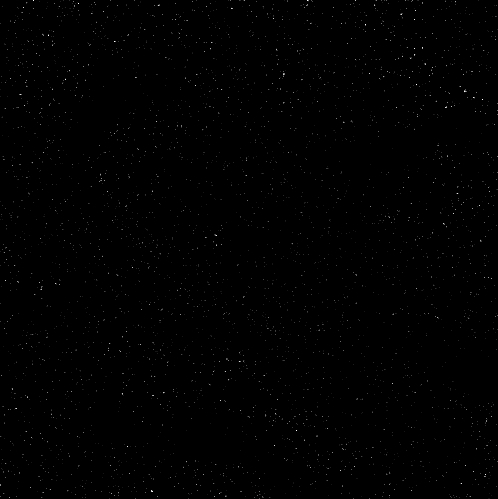
Notice that our stars are distributed fairly evenly around our image. In the real world, there are sections of the sky that appear to the naked eye to have no stars. Let's take a second and give our space scene a small section or two of emptiness.

  1. Click the Eraser Tool...

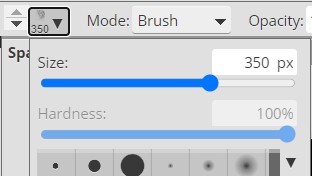
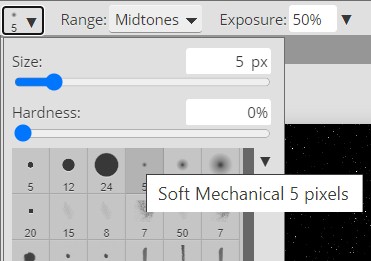
We don't want to use a simple round brush to create our areas of empty space as it will be obvious that we have removed stars because there will be hard edges to our emptiness, so let's choose a more random brush.

  1. Click the Brush Preset picker option and select the Sketching Hard brush...

    Note that if you point at a brush and pause for just a moment a small pop-up will display letting you know the brush's name
  2. Press Ctrl+0 to view the entire image
  3. We need to use a large brush for this, so change the size of your brush so that it is about the same size in relation to the rest of your image as the graphic below...

    For my image, I had to set the brush size to 350...

    Note that not only can you type the brush size in the Size box, but you can use the ] key to increase the Brush size (the [ key will decrease the Brush size)
  4. Make sure you are on the Far Stars layer (the other two layers should be locked) and click randomly in a few places to remove some stars - keep in mind that the eraser you are using has a very scattered shape so that you can create dark areas that are not necessarily totally dark but still contain a very scattered group of stars, so if you want to create a truly empty area you will need to do repeated clicks and drags over the same area to totally remove everything

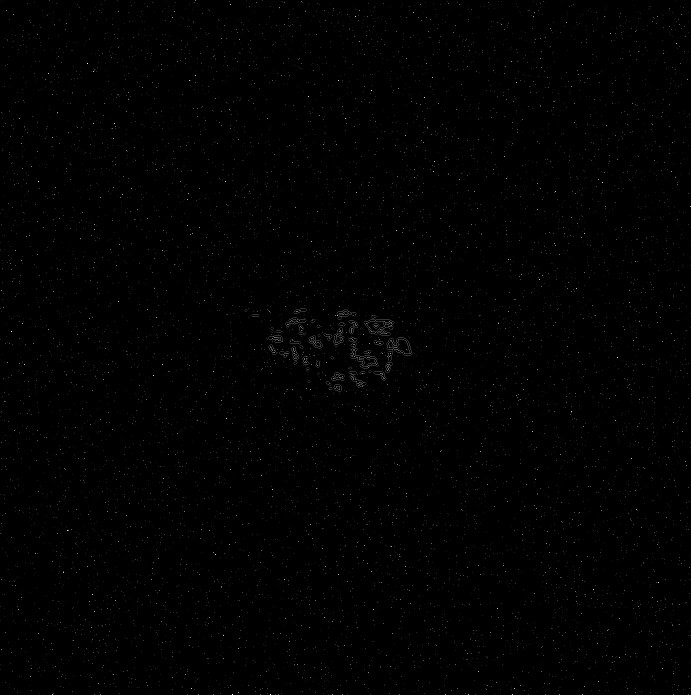
DO NOT GO CRAZY WITH THIS!!

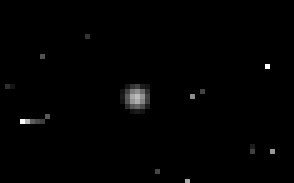
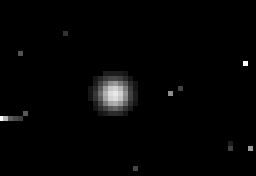
We just want to remove a few stars here and there. Look at the two images below...

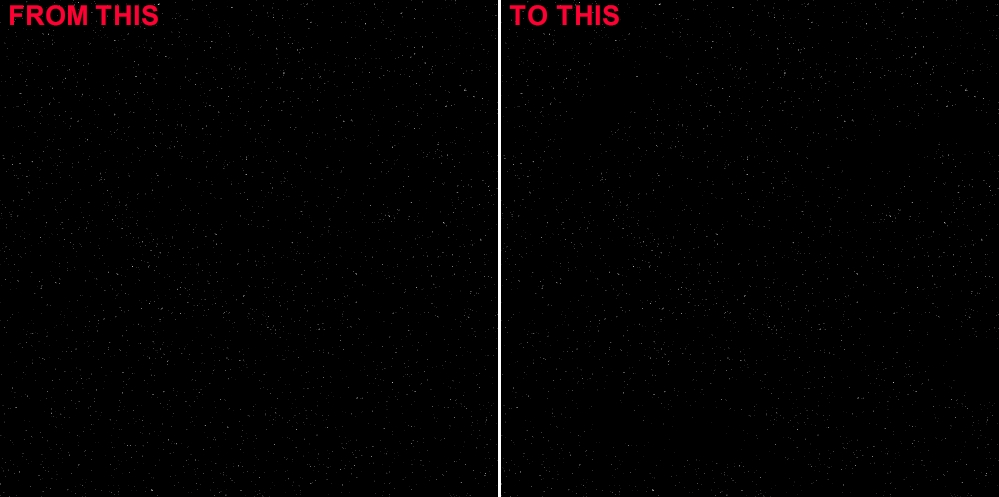
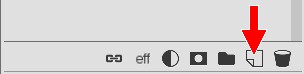
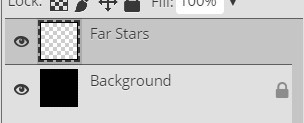
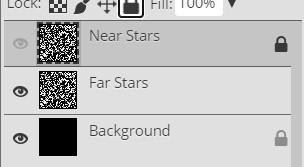
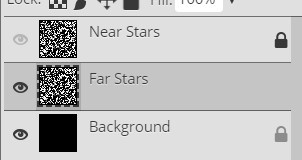
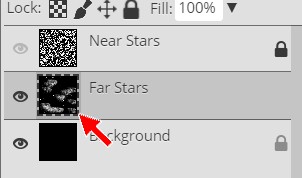
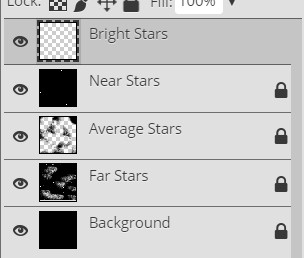
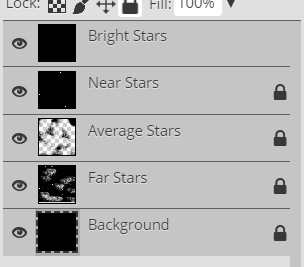
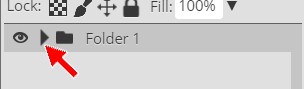
Notice that you really have to look hard to notice where the areas of empty space are. If you look at the Far Stars layer's thumbnail image on the Layers panel (the red arrow in the image below) you can see exactly where you removed the stars because you will be able to see white spots...

This is what we want at this point - later we will be adding more stars and these few blank areas will become more noticeable.


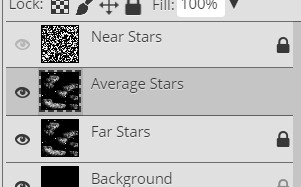
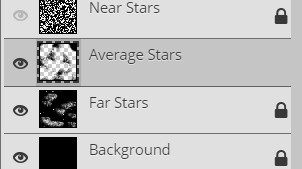
Now that we've got some stars that appear dim and far away, let's create some average looking stars that appear to be a little closer to us. To pull this off we simply have to make a duplicate of our Far Stars layer and then break out our Eraser Tool again.

  1. Lock the Far Stars layer
  2. Right-click the Far Stars layer and click Duplicate Layer
  3. Rename the duplicate layer Average Stars...

At this point, each layer is actually covering up every other layer. With multiple layers of stars, it would be great to have a way to see what is under a layer while still being able to see the contents of that layer. Lucky for us blending modes are a thing.

  1. Make sure the Average Stars layer is unlocked - it should be unlocked by default but you should get used to checking these things to make sure everything is the way we want it before moving on
  2. Click the Set the blending mode for the layer drop-down arrow (red arrow below) and select Linear Dodge (you will need to scroll down in the list to locate Linear Dodge)...

    This allows us to see what is below this layer

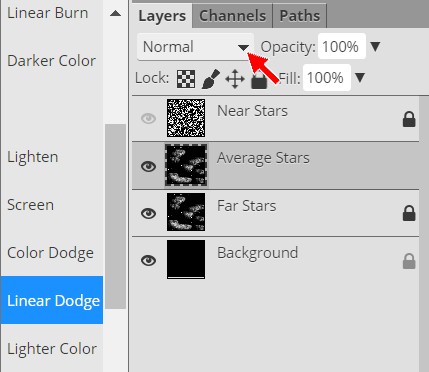
The Linear Dodge blending mode allows us to see through the black on the layer to what's underneath it. OK, to be totally honest here, Linear Dodge actually does more than make black see-through, but for what we are doing now, knowing that it allows us to see-through black is good enough. Notice that many of the stars are now brighter because we actually have two identical images on top of each other and they are complimenting each other to make the stars brighter. We now need to remove most of the stars from the Average Stars layer so that we have some dim stars that appear far away (now you know why we named the first layer Far Stars) and some brighter stars that seem closer (the Average Stars layer). A few directions from now we will get some stars that appear very near to us as well as some awesome bright stars.

  1. Make sure the Average Stars layer is the active layer (all other layers should be locked and the visibility of the Near Stars layer should be off)
  2. Click the Eraser Tool
  3. Erase most of the stars from your Average Stars layer - remember to keep an eye on the layer's thumbnail on the Layers panel to see where and how much of your Average Stars you are removing - you want to end up with something like this...

    You can turn the visibility of the Average Stars layer on and off to see exactly what impact this layer is having on your star field

Keep in mind that you don't have to remove stars from you Average Stars layer in the same patter as I did - try to be unique. As the direction above stated, you want to remove most of your Average Stars so that what's left will work with the Far Stars layer to give your star field some depth. If you leave too many Average Stars you end up with stars that all look the same. Your star field should now look something like this...


Note that your stars will NOT look exactly like mine

We have some pretty awesome looking far and average stars, so let's add in a few near stars to complete the sense of depth.

  1. Lock the Average Stars layer
  2. Turn the visibility of the Near Stars layer on, unlock it, and make it the active layer...

    Note that when you do this that your image should now be covered with noise...
  3. Click Filter then point at Blur and click Gaussian Blur...
  4. Set the Radius to 2 Pixels - this will make your noise really blurry - and click OK
  5. Click Image then point at Adjustments and then click Levels...
  6. Drag the black Input Level slider to the right and stop at 145...
  7. Drag the white Input Level slider to the left as far as it will go...

    Notice that it stops automatically at 147...

    The closest you can make the black and white sliders is two numbers apart
  8. Click OK

Notice that you have only a few stars that are slightly larger than those on the Far Stars and Average Stars layers...

This is good - this is what we want at this point.

  1. Change the blending mode of the Near Stars layer to Linear Dodge - you should now be able to see all of the stars in your image

We do have a slight issue at this point. Recall that we made a copy of our noise filled layer all the way back in direction 12, so at this point all of our layers have stars sitting in the exact same place. If we leave our star field like this we will simply be creating several really bright stars on top of other stars. Let's add some variety to our star field by adjusting the Near Stars layer so that we are not covering up other stars.

  1. Make sure the Near Stars layer is the active layer - it should be highlighted in gray
  2. Click Edit on the Menu Bar...

    Then point at Transform and click Flip Vertical...

At first it may look like nothing happened because there are so few stars on the Near Stars layer, but turn the visibility of the Near Stars layer off and on and you will see the impact that it has. It is not making an enormous change, but by having these slightly brighter stars we have given our space scene some awesome depth.

You should have something similar to the image below...

You should notice that there are areas of dense stars and areas of fewer stars and that the areas of no stars are now more obvious. Feel free to remove more or less stars until you get something you like. Be careful though - once you remove stars it can be very difficult to get them back if you change your mind.


Now that our basic star field is ready to go, let's give it a sense of uniqueness and coolness by adding a few really bright stars.

  1. Lock the Near Stars layer
  2. Insert a new layer and name it Bright Stars - make sure this new layer is at the top of the layer stack and is selected...
  3. Use the Paint Bucket Tool  to fill the Bright Stars layer with black
  4. Change the blending mode of the Bright Stars layer to Linear Dodge
  5. Press Ctrl+0 to zoom in to 100%
  6. Click the Dodge Tool...

    The Dodge Tool simply brightens up an area of an image, so it is perfect for creating bright spots that look like stars
  7. On the Dodge Tool Options Bar, change the Range: setting from Midtones to Shadows...

    Make sure Exposure is set to 50%
  8. Change the Brush to Soft Mechanical 5 pixels...
Choose the area of your image you would like to add a bright star. Remember that you can use the Hand tool to move the image around and find a good spot (to avoid having to change from the Dodge Tool to the Hand Tool and back again, you can press and hold the spacebar and then click and drag to move around the image). Keep in mind that in later steps you will be adding a bunch of other stuff like planets, asteroids, a comet, and more, so put your bright stars in places that you will not cover up later on.
  1. Press D on the keyboard to reset the Foreground color to black and the Background color to white...
  2. Click the Swap Colors icon...

    You should now have white as your Foreground color and black as your background color...
  3. Click repeatedly in one spot until the spot glows white (about 15 clicks seems to work well) - be careful not to click and drag but instead click in the same spot over and over and over and over and over and over and over and over and over and over and over and over and over and over and over...

    Note that the image above is zoomed in to 500% to show the detail, so you may need to zoom in on your spot to see it better
  4. Press the right bracket key ] to increase the brush size to something slightly larger, such as 9 px, and then click some more in the same spot (don't click as many times as you did in the last direction - try around 10 clicks this time - so that what you are creating now is not as bright)...
  5. Increase the brush size again (this time to around 15 px) and click some more (around 5 clicks this time)...
  6. Increase the brush size one more time (try from 20 to 25 px) and click a few more times (only 3 or 4)...

    Note that the image above really doesn't look all that great because the image is actually being displayed in a webpage - your image in ToolPic should look much nicer
  7. Determine if you like your star at this point or if you want to change it - you can increase the brush and click a few more times, or you can grab the Eraser Tool and remove what you have and start over, but this time vary the above brush sizes and click recommendations so that you have a really nice looking, unique star

You may be tempted to keep going and make a really, really big glowing star, but don't. If you make your star too large it will seem unnatural. Remember that we want realistic looking stars and not huge white blobs.

One way to get unique bright stars is to load brush sets with additional brushes into ToolPic and use them to build uniquely shaped stars. ToolPic includes just a few built-in brushes, so to get more you will need to download them. There are several sites that allow you to download additional brushes. Simply search the Internet for photoshop free brushes (both photoshop free and ToolPic can load additional brushes with an abr file extension). Or you can use the links below to download all of photoshop free's legacy brushes (in other words, if you want some brushes that are not Adobe brushes, and there are literally thousands of them, you will have to search the Internet).

Assorted Brushes Basic Brushes Calligraphic Brushes DP Brushes
Drop Shadow Brushes Dry Media Brushes Faux Finish Brushes M Brushes
Natural Brushes Natural Brushes 2 photoshop free Default Brushes Round Brushes with Size
Special Effect Brushes Square Brushes Thick Heavy Brushes Web Media Brushes
Converted Legacy Tool Presets Legacy Brushes

The bottom 2 links will download all of the brushes linked above them. These links allows you to download several hundred brushes, so be careful if you don't want to overload your brush list.

When choosing brushes to use for your bright stars, I recommend using patterned brushes such as S, star (NOT the 5-pointed star), Starburst, or any other brush shape that gives you a nice looking star (do not use Fuzzball, Flowing Stars, any of the leaf or grass brushes, or any other brush that looks unnatural).

If you are ahead with your work, take some time to look at several different brush sets to see if there are any brushes you would like to use (again, stay away from the brushes shaped like grass, leaves, 5-pointed stars, as well any that are square as there are no real stars in the sky shaped like these. Try to make your stars unique and something other than a perfect circle (feel free to add some color to your bright stars if you wish, but remember to keep it subtle).

To help you out with making some really unique starts, have a look at the image below...

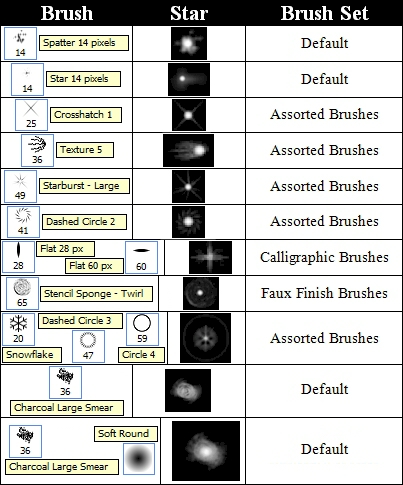
The really cool stars in the middle column were created using the brushes in the left column, which can be found in the brush set indicated in the right column. Keep in mind two very important things as you create your bright stars:

  1. Add in three or four bright stars (if you add too many you will limit where you can put the planets and stuff we will be adding later) - DO NOT copy the same star over and over (no two real stars look exactly alike) and DO NOT use the same brush multiple 
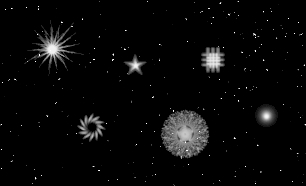
times - this looks unnatural; make each star unique - here is a close-up of my four stars...
     
    Notice that the stars are all unique, and that the third one from the left has just a slight amount of yellow added to it (I know, they are awesome)

Let me say that one more time: DO NOT copy the same bright star multiple times

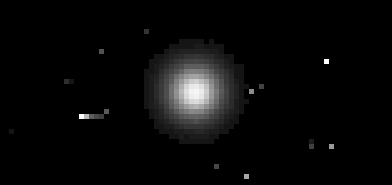
Be careful not to go crazy with how big you make your bright stars. Take a look at the image below...

Notice that it looks like a fake star when you compare it to the stars below - we are striving to make our image as realistic as possible.

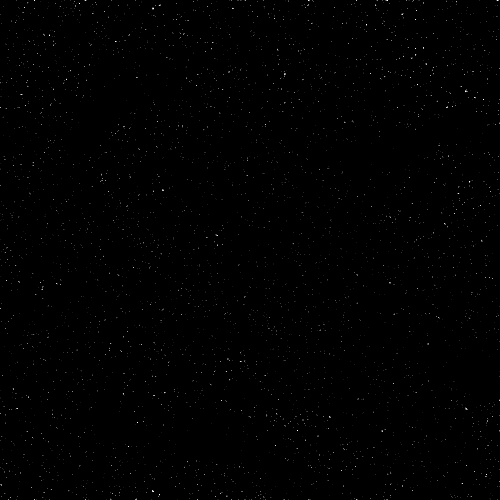
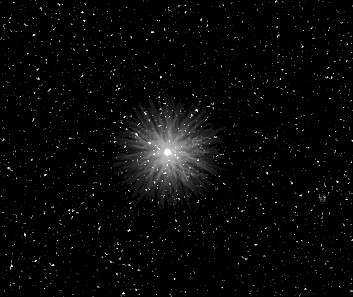
Your star field should now be complete, and should look something like this (remember that your stars will be in different places than mine)...

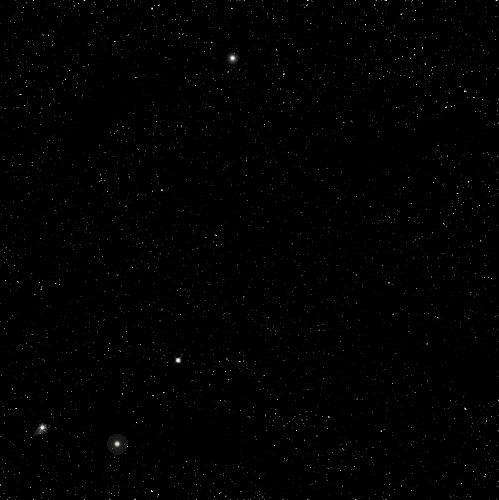
Notice that my bright stars are not overly large and serve to add a nice accent to my star field. Notice also that all four of them do NOT look the same.

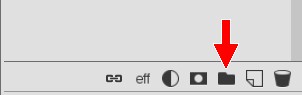
Before we continue creating our amazing space panorama, we need to put all of the star field layers into one folder group so that we can work with them all at the same time to do such things as turn off their visibility or rearrange them in the layer stack.

  1. Select all of the layers by clicking the top layer (Bright Stars) then pressing and holding Shift and clicking the bottom layer (Background)...
  2. Click the New Folder icon to create a group containing all of the layers (the red arrow below)...
  3. The layers will be inserted into a group called Folder 1...

    Note two things:
    • This is very similar to creating a folder in My Computer and placing files in it
    • You can expand the group and view the layers in it at any time by clicking the arrow head between the eye and the folder icon...
  4. Double-click the name Folder 1 and rename it Star Field...
  5. Lock the Star Field folder group so you do not accidentally mess up any of the layers...

In the next Step we will give our space scene some color by adding in a nice nebula.

  1. Click File then click Save as PSD
  2. Name the file Space10

01 | 02 | 03 | 04 | 05 | 06 | 07 | 08 | 09 | 10 | 11 | 12 | 13 | 14 | 15 | 16 | 17 | 18 | 19 | 20