

Online toolpic free Photoshop layers
Use layers to perform multiple tasks, such as compositing multiple images, adding text to images, or adding vector graphic shapes.
You can add layer styles to effects such as drop shadows, glow, or sharpen objects.
You can also change the opacity of a layer to make its content partially transparent.
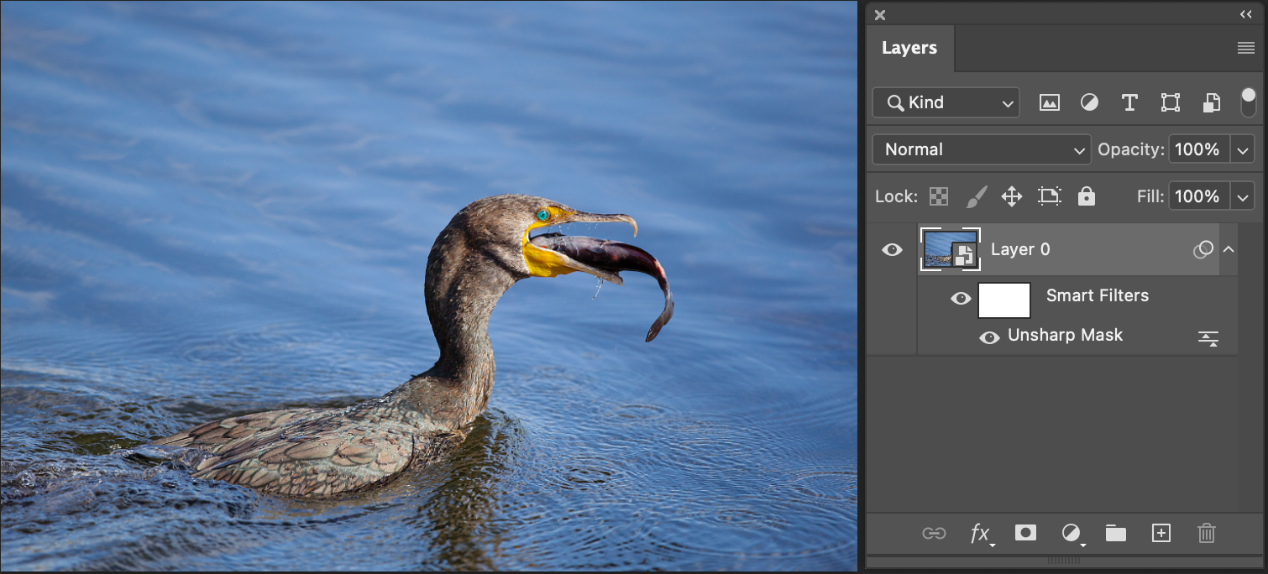 Sharpening details makes objects stand out in nature photos. Use layers to edit without destroying the original image, and use the Passivation Mask filter to highlight details.
Use layer groups to organize and manage layers
When working with a new image, you usually start with a single layer, and the number of layers, layer effects, and layer sets you can add is largely limited by your imagination.
Manage and organize layers in the Layers panel, and use groups to arrange them logically to avoid clutter in the panel. You can nest groups and use them to apply attributes and masks to multiple layers at the same time.
For some important tips on working with layers, watch the tutorial video Organize with Layers and Layer Groups.
Use layers to edit without destroying the original image
- Adjustment layer: Adjust the color and tone in the image without destroying the original image, and continuously edit the adjustment layer without changing the pixels in the image. In short, they give them more control over image editing operations than direct adjustments, and they are more flexible. To learn more about working with adjustment layers, check out Adjustment Layers and Fill Layers.
- Smart Objects: Smart Objects are layers that contain image data from raster or vector images. They preserve the source content of an image and all of its original properties, allowing you to edit layers without destroying the original image. To learn more about working with Smart Objects, see Working with Smart Objects.
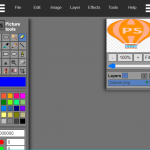
Use the Layers panel
Use the Layers panel to view, create, and edit layers, layer groups, and layer effects in images.
Navigate to the window > layer or press F7 to open the panel.
Use this menu to create or duplicate layers, work with layer groups, convert to Smart Objects, and add layer effects.
You can also use this menu to resize thumbnails. Select your preferred thumbnail and use the right-click option to select the appropriate size.
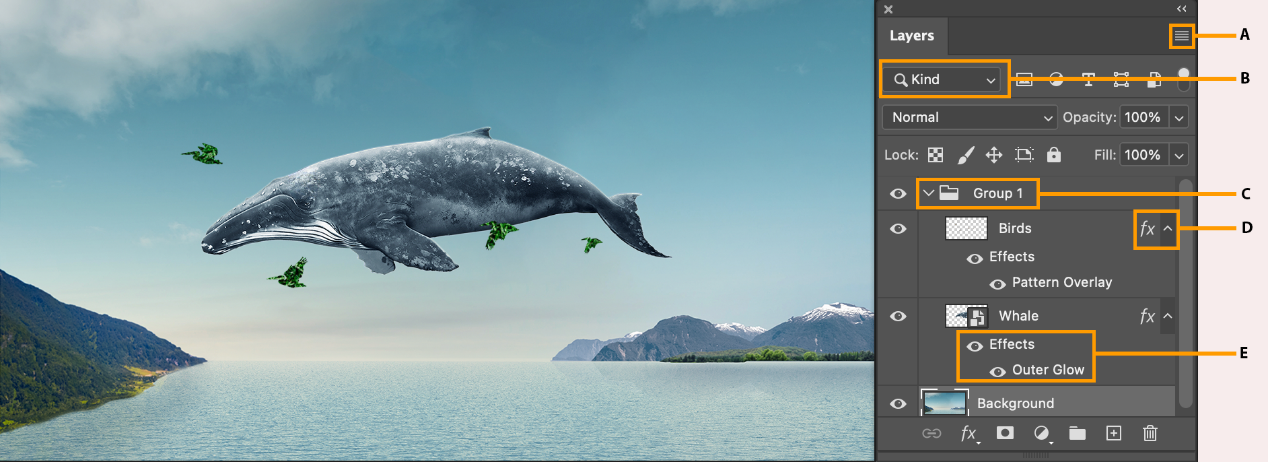 A. Layer panel menu, B. Layer filter, C. Layer group, D. Expand and collapse layer effect, E. Layer effect
Change the contents of the thumbnail
Choose a panel option from the Layers panel menu, and then select the entire document to display the contents of the entire document. Select a layer boundary to limit the thumbnail to the pixels of the objects on the layer.
Note:
You can also turn off thumbnails to improve performance and save canvas space.
Filter layers
Use the filter options at the top of the Layers panel to find key layers in complex documents. You can use a given option kind, name, effect, mode, or artboard to display a subset of layers.
Follow the steps below to use the filter options of the Layers panel.
 Filter options in the Layers panel; use the toggle switch to toggle between different layer filters
- Select a filter type from the pop-up menu.
- Select or enter a filter.
- Click the button toggle Layer Filtering on or off.
Video layers
You can use video layers to add video to your image.
After you import a video clip into an image as a video layer, you can do the following:
- Mask/transform layers
- Apply layer effects
- Paint on individual frames, or
- Rasterize individual frames and convert them to standard layers
You can use the Timeline panel to play a video in an image or access individual frames. See Supported video and image sequence formats.
Create a new layer when using a brush
By default, shapes and text are created on a layer type called a vector layer. No matter how many times you zoom in on the vector layer, the edges always remain very sharp.
When you rasterize a vector layer, Photoshop converts the layer to pixels. You may not notice the change at first, but when you zoom in on the newly rasterized layer, you’ll see that the edges are now made up of small squares called pixels.
Some tools, such as the Brush tool, Eraser, Paint Bucket Fill, and Filter, only work with rasterized layers. To use one of these tools on a vector layer, you must first convert the layer to pixels.
Please note: When converting a vector layer to pixels, it loses its vector functionality, which means:
- Shapes and text can no longer be scaled to any size without losing quality.
- The text is no longer editable, which means you can’t change the words or fonts.
Instead of rasterizing, you can create an empty layer on top of a vector layer and then use any painting or painting tools on the new layer.
Select the new layer icon in the Layers panel and use the Brush tool to paint on a new layer.
Alternatively, navigate to Preferences > General > Create a new layer while using a brush to automatically create a new layer. If on, when a brush is used on a layer that cannot be painted, such as a Smart Object, type, or adjustment layer, or when no layer is active, a new pixel layer is automatically created in the layer stack, and all strokes are applied in the new layer.
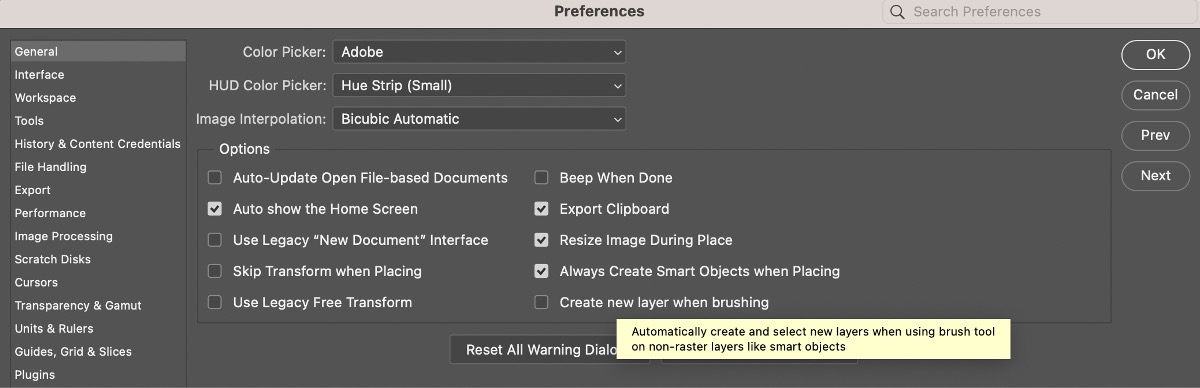 Navigate to Preferences> General > Create New Layer When Using Brushes to turn off the preference.
Convert backgrounds and Photoshop layers
When creating a new image with a white/colored background, the background is the starting (bottommost) layer. An image can have only one background layer.
While you can’t change the stacking order of a background layer or its blending mode and opacity, you can convert it to a regular layer and then modify its properties.
When you create a new image with transparent content, the image doesn’t have a background layer. You can move this layer anywhere in the Layers panel, as well as its opacity and blending mode.
Follow these steps to convert a background layer to a regular layer:
- Double-click the background in the layer panel, or navigate to Layer > New > Layer Background.
- Set layer options. (See Create layers and groups.) )
- Select OK.
Follow these steps to convert a regular layer to a background layer:
- Select the general layer in the Layers panel.
- Navigate to Layer > New > Layer Background.
Any transparent pixels in the layer are converted to the background color, and the layer is placed at the bottom of the layer stack.
Note:
You can’t create a background by naming a regular layer a background, you have to use the Layer Background command.
Please indicate:Free Editor Online Photoshop » Online toolpic free Photoshop layers


 Gender Double Label Revealed 9 Illustrations Reveal the Invisible Rules Around Us!

Login to comment! If you already have an account, please first log in,No please registered or