

This tutorial is to show the effect of seeing the night scene outside through the glass full of raindrops. In the production process, you need to blur and darken the background image, and then modify the raindrops and text on the glass! The production method is very simple, let’s learn it together!
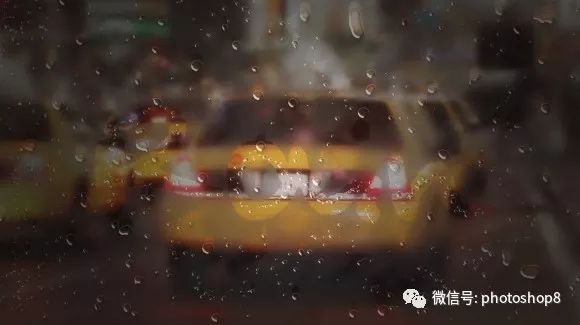
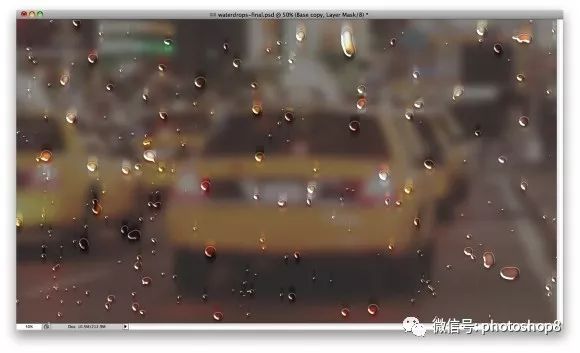
Final effect picture:
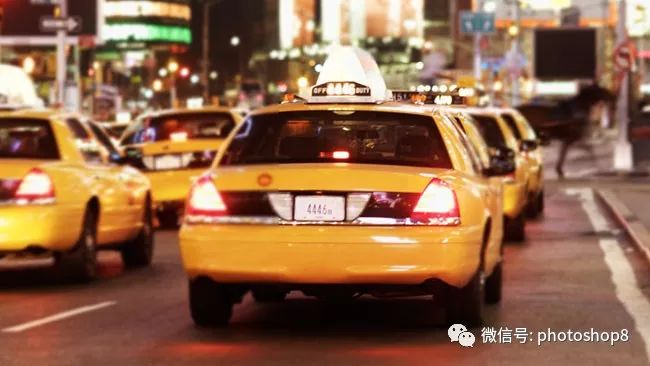
Original image:
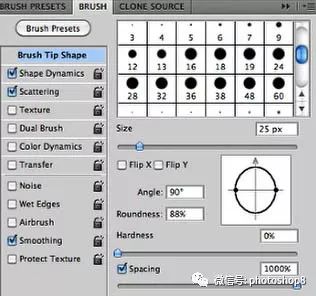
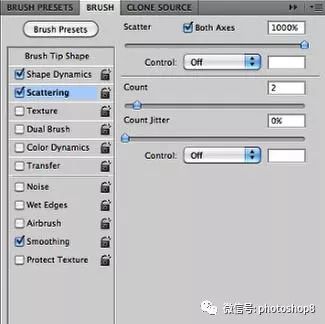
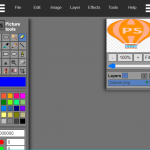
< strong > < span > Step 1, < / span > < / strong > create a new document with 2560 times 1440 pixels, and the background color is filled with dark gray. Press F5 to open the brush panel. The settings of the brush are shown in the figure below.

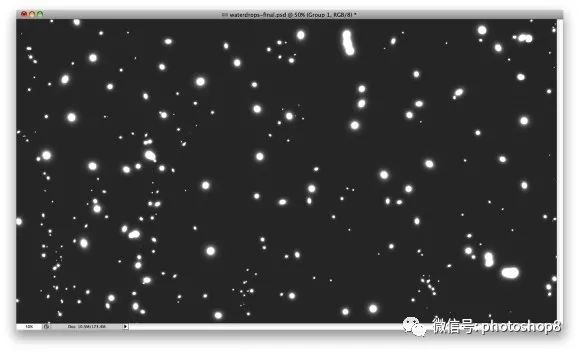
< strong > < span > Step 2, < / span > < / strong > create a new group, create a new layer under the group, brush layer 1 with the just adjusted white brush, and constantly change the size of the brush, the effect will be better.
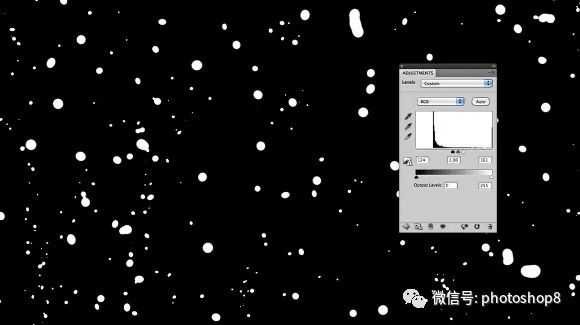
< strong > < span > Step 3. < / span > < / strong > combine the background layer with the background layer. Press and hold the CTRL + L key to open the color scale panel, set Black: 124, white: 161; eliminate blurred edges.
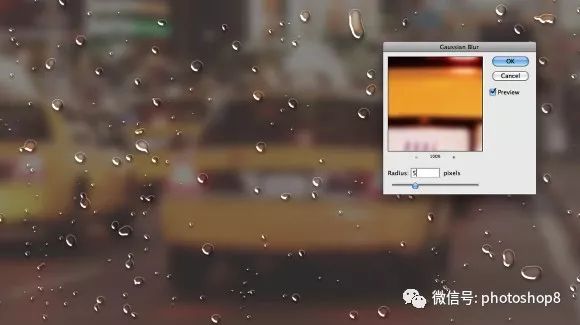
< strong > < span > Step 4, < / span > < / strong > select the dark background area with magic wand tool, right-click to select “select similar”, make sure all dark backgrounds are selected, and then delete. Import the material image and copy it, set Gaussian blur to 20. Select layer style, add color overlay, dark gray, 60% opacity.
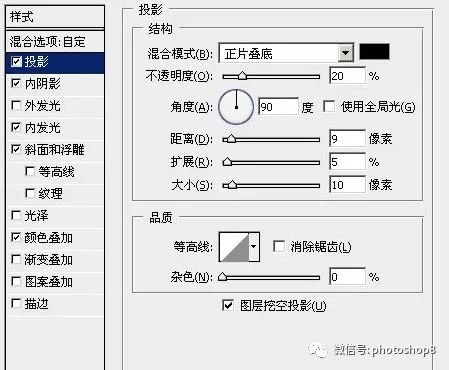
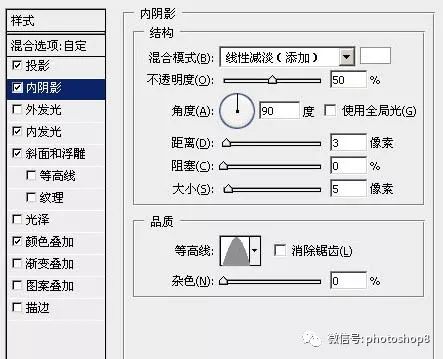
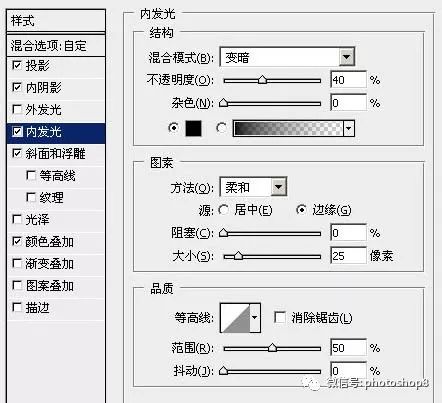
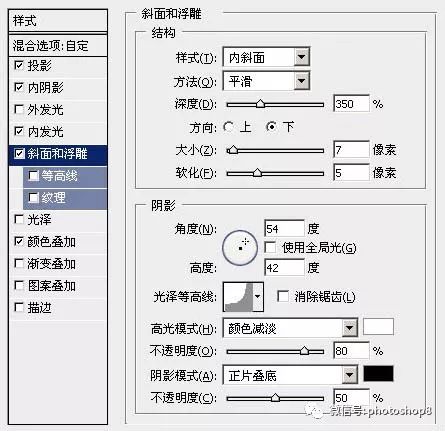
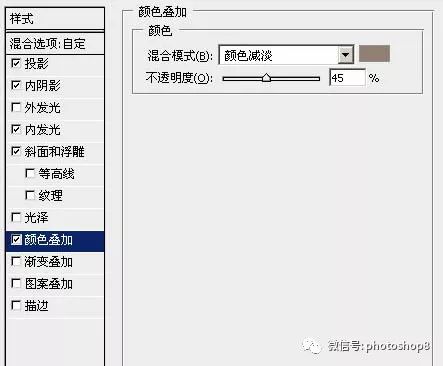
< strong > < span > Step 5, < / span > < / strong > put the background layer on the top and set the layer style as follows:
< strong > < span > Step 6, < / span > < / strong > copy the material layer again, Gaussian blur 5. Put it on the first copy of the material layer.
< strong > < span > Step 7, < / span > < / strong > select the selection of layer 1, select the second copy of the material layer, add a mask, execute: quick mask or layer & gt; Layer Mask & gt; display the selection. Add motion blur to the mask, set to angle – 90, distance 80 pixels. Open the color scale and adjust the value as shown in the figure below to eliminate the blurred edge.
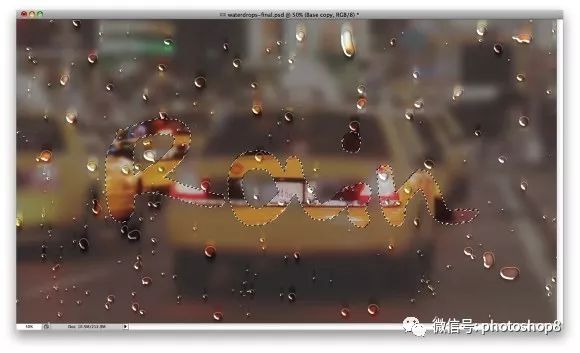
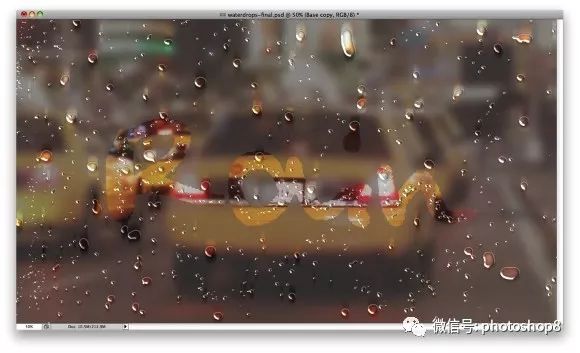
< strong > < span > Step 8, < / span > < / strong > copy and add a 5-pixel Gaussian blur layer, delete the mask, add a few words, and then repeat the above steps.
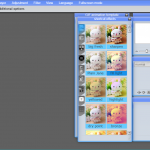
< strong > < span > Step 9, < / span > < / strong > create a new layer under the water drop layer, add more small water drops with a brush, and copy the previously added water drop layer style to this layer. The effect is as follows:
< strong > < span > Step 10, < / span > < / strong > copy the layer of the previous step and delete the mask. Execute: Layer & gt; Layer Mask & gt; hide all. Add cloud effect to the mask, set the front background color to black and white, the effect is more realistic. The results are as follows:

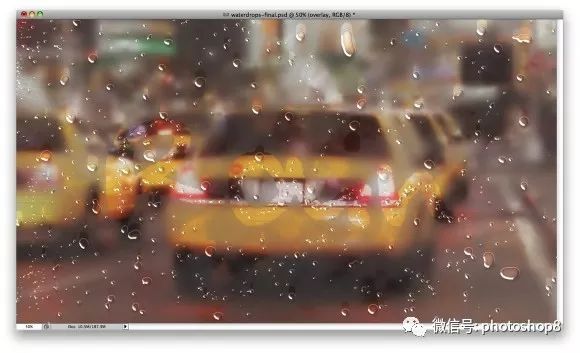
< strong > < span > step 11, < / span > < / strong > select all layers, press and hold the CTRL + Shift + Alt + e key to seal. Add another 20 Gauss blur to the stamped layer, set the blending mode to overlay, and set the opacity to 40%. Copy the seal layer, change the mixing mode to filter color, and the opacity is 40%. The results are as follows
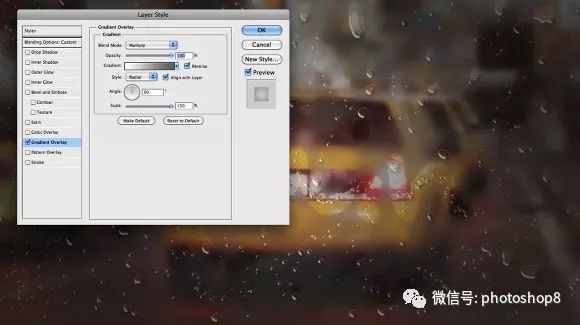
< strong > < span > Step 12, < / span > < / strong > create a new layer at the top, fill it with any color, and change the fill to 0%. Add a gradient fill layer style. The settings are as follows:
Set it up and it’s done! Final effect picture:
< strong > < span > summary: < / span > < / strong > to process this kind of image, we need to use Gaussian Blur effect many times and adjust the color brightness. I believe my friends have learned it after finishing! Finally, thank you very much for your reading!
Please indicate:Free Editor Online Photoshop » Add rain and fog glass effect to the picture


 Gender Double Label Revealed 9 Illustrations Reveal the Invisible Rules Around Us!
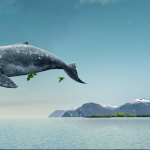

Login to comment! If you already have an account, please first log in,No please registered or