

1. New document shortcut: Ctrl+N The unit of resolution of the new document is Ppi, 72ppi means that one inch is composed of 72 pixels, the larger the resolution, the more pixels, the clearer. The more detail you have, the more memory you have.
Common resolution settings: color mode:
RGB: red, green, blue (color luminescence principle) CMYK: printing color mode, cyan, magenta, yellow, black ink mixed color mode number of bits: 8 bits (common), 16 bits, 32 bits
A04-New Document-A New Beginning… P4 – 08:34 Foreground color background color (the top of the toolbar is the foreground color, the bottom is the background color) Switch the background color of the foreground color
in the upper right corner, and restore the default background color of the foreground color in the lower left corner (shortcut key D recovery
) Pixel aspect ratio: generally use square pixels to save the preset of the new document
2.Modify the image size menu (image
menu) – image size (modify the image size shortcut: Alt+Ctrl+I) Uncheck Resample, the pixel value is locked, you can only modify the file size, the total pixel value of the screen = the width of the pixel value× the height of the
pixel value, the total pixel value of the screen = height (inches), × width (inches), × resolution (pixels/inches) ² 3.Save the file to open the file:
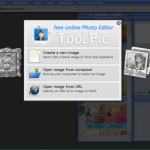
1.File menu – open document – select document – open 2.Double-click the work surface to open the file 3.Open the file: Ctrl+O filter the image sequence by file type and format: When opening a document, check the box to select multiple images in order to name them….
A06 – Will open, will save, I really will (save…) P6 – 02:37 Image Sequence Demo Window Menu – Timeline – Can display ↑ multi-select images (Timeline:
used for film and television animation) When the document is modified, there will be an additional “*” on the tab bar, which means that the document has been modified but has not yet been savedFile
Menu – Save (save in place) (After saving, the save key will be grayed out) Save shortcut key: Ctrl+S File Menu – Save as: You can choose the storage location, name, and format to save as: Shift+Ctrl+S
to understand the three formats of PSD, JPG, GIF 5:31-6:36 A06-Will
open, will save, I really know (save… P6 – 05:31 GET TO KNOW PSD, JPG, GIFClose Documents:
1.”×” on the tab;2.File Menu – Close Ctrl+W3.File Menu – Close All
4.Adjust Software Settings1.Set Up Scratch Disk (Data is temporarily stored in hard disk space)
A07 – It’s time to start preparing for battle!(Performance Configuration… P7 – 01:08 Edit Menu – Preferences Ctrl+K – Bring Up Scratch Disk 2.Set History CountIncrease History Count and Get Back More History Window Menu – History 3.Auto Save Settings
Open Preferences – File Handling – Auto Save (Can Run in the Background) 4.Shortcut Settings Edit Menu – Keyboard Shortcut (Ctrl+Shift+Alt+.) K) – Ability to add or modify shortcut preferences: options that need to be adjusted before starting work
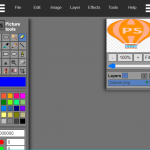
5. Layer BasicsLayer menu, layer panel
to bring up layer panel window menu – layer (F7)1.Know the layer panel, select different types, you can search and filter the drop-down menu under the layer type: Options for layer blending modeLock options: Four fills: Adjust the fill degree of image pixels
Layer list: You can list all layers, and arrange the bottom button in the order of overlay from left to right: link layer, layer style, add mask, add adjustment layer, create new group, create new layer, delete panel menu in the upper right corner of the panel2.Layer concept layer: simply put, it is the level of the image, you can adjust and modify the layer separately, without affecting other layers. 3. Layer classification includes normal layer, background~, smart object~, adjustment~, fill~, video~, vector~, 3D~, text~… Different types of layers have different functions and properties4.Create a layerCreate a normal layer: (1) Use the “Create New Layer” button on the panel; (2) Or use Alt to pop up the button of the new layer; (3) When creating a new layer in the layer menu – New – Layer (New Layer: Ctrl+Shift+N
), you can set the name, select the layer recognition color (note: not the pixel color on the layer), the layer blending mode, and the opacity color are used for identification and classification, which are clearly distinguished in the layer panel in the layer panel: double-click the layer name to change the name, and double-click elsewhere to pop up the layer style window 5
Click the small eye in the layer panel: turn on or off the display of layer pixels when saving JPG or other format images, the hidden layer does not show the layer hidden by the shortcut key at the target layer: use Alt+ the small eye of the layer to be displayed, you can hide other layers, and then Alt+ small eye can be restored. Drag and drop the layer, change the order of the layers up and down (the order of overlay also changes), layer menu – arrange Ctrl + left bracket to move the selected layer down one layer; Move the right bracket up to copy a layer: press Alt to drag a layer; Layer Menu – Duplicate Layer; Drag and drop the layer to the “New Layer” button (Ctrl+J to create a new copied
layer) to delete the layer: “Delete Layer” button; Drag and drop the layer to “Delete Layer”; Right-click to delete; Press Delete to delete
6.View zoom work information bar in the lower left corner to change the size of the picture, toolbar: Hand tool, zoom tool 1.Hand tool: click and drag in the picture, move the screen by holding down the space bar to turn into the hand tool, release the space bar to return to the original tool; (Options bar, adjust the tool: 100%, fit to the screen, fill the screen) 2.Rotate view tool: Press the gripper tool in the toolbar to not loosen, and the rotate view tool (R) appears3.Zoom tool: zoom in and out of the screen (adjust the zoom in or out in the option bar), you can right-click to zoom out and zoom out: click on the image and move the mouse left and right to zoom in on the view (the mouse zooms in to the right screen; Zoom out to the left) double-click the Hand tool to zoom in and out to the screen size; Double-click the zoom tool to show the image in actual size: Ctrl+”plus”; Zoom out: Ctrl+”minus”4.Navigator panel window menu – navigator, the slider below the navigator can control the screen size, the red box is the current display area (can be dragged
)7.Move tool (V in English) 1.Move between multiple documents
Drag layer 5 to the label of file 1, after letting go, activate file 1, and then drag it to the layer of file 1, a small plus sign appears, let go, you can copy layer 5 to file 1 drag position according to the mouse position when dragging activation, press shift, and then release the mouse, you can keep it in place (premise: the document size is the same) move the tool for the currently selected layer
2. Open the automatic selection option bar in the automatic selection options bar, click the layer object reliably to select the layer move tool state, press Ctrl to quickly switch the automatic selection mode, and release it to return to the original layer state3. Copy the layer object under the premise of point 2 (?) combine the Alt key to copy the layer; Combined shift, constrained angle; Arrow keys + shift: increase the step size, and then press the arrow keys to fine-tune; D-pad + Alt: Copy
the layer 4.Select “Show Transform Control” in the option bar of the transform control, you can transform the layer object, right-click on the form of the transformation8.1.The concept of selection selection 2.The basic way to establish a rectangular selection Rectangular selection tool (M), the cursor is “ten” (shift+M to switch between different marquee tools; Or Alt+click the marquee tool to switch)
Draw a selection: free selection – click the left mouse button and drag; Square selection – drag with left mouse button + press shift; Center Point to Create a Selection – Starting from the intersection point, press Alt+ and drag the mouse; Select a square from the center point – Alt+shift to deselect the area at the same time: click (Ctrl+D) outside the selection, then Ctrl+shift+D when the selection disappears and re-select (select menu) Ctrl
+H to hide the guides, but the selection is still there, press Ctrl+H selection appears again, you can also retrieve it through the history tool, the mouse becomes a white arrow in the selection, you can move the selection, there is no impact on the screen3.The saving and loading of the selection can only be saved in the PSD file after the selection is saved, right-click – save the selection, load the selection
9. Marquee Tool1.There are four ways to combine selections (four buttons at the bottom of the edit menu) (1) New selection: only keep the newly created selection at a time (2) Add to selection: the old and new selections can exist at the same time, and if you create a selection in the overlapping part of multiple selections, you can merge the selections in the new selection mode and press shift to switch to add to selection mode, and release it to revert to the new selection (press shift first and then select the selection) (3) Subtract from the selection: Subtract the newly drawn selection in the new selection mode and press alt to switch to subtract from the selection, release to restore to the new selection (4) Cross with the selection: take the place where the two selections are merged and press shift+ in the new selection mode to switch to the intersection mode with the selection, release to restore to the new selection 2.
P12 – 05:02What is feathering, that is: the edge of the selection is transitionally bokeh, so that the unit of feathering is the pixel that naturally connects the inside and outside of the selection, set the feathering value first, then select the selection/or select the area first, select Menu-Modify-Feather (shift+F6)3.Set the selection scale or size style/fixed proportion/fixed size4.Eliminate aliasing optionEliminate aliasing, so that the edges are softer
10. Lasso (L) and Magic Wand Quick Selection1.The left mouse button of the lasso tool is not loose, and you can create an irregular selection (press shift+L or press alt to switch to other tools)2.Polygon lasso (not suitable for complex) Click the key points on the screen to connect them in a straight line to form a polygon area, which must be connected end to end to complete the selection (there are small circle points; Handover shortcuts: double-click/hold Ctrl left-click/press Enter) You can use the back key or Delete to delete the wrong point, and use Esc to deselect the transform control as a whole (?I don’t remember learning this) 3.The magnetic lasso is similar to the polygon lasso, no need to click, moving the mouse will automatically identify the key points, you can also manually select the point, and you can move slowly if you need to select the area accurately. Width: The smaller the width, the smaller the recognition rangeContrast: Pictures with clearer edges can be used for high contrast; If the picture is blurry, the width and contrast should be lowered frequency: adjust the number of points4.The magic wand tool (W combination shift switch) can quickly turn the area with similar colors into a selection, right-click after selection and select reverse (Ctrl+shift+I)Sampling size: control the sample color tolerance of sampling: you can adjust the recognition range, the larger the tolerance, the larger the recognition range continuously: Check Consecutive can only select similar pixels that are adjacent to each otherRight-click menu – color range, use the eye picker to select the same pixel 5.Quick selection tool Three modes: normal/increase/subtract brush options: (1) Size – recognition range (left and right brackets); (2) Hardness – edge recognition ability, spacing (shift+left and right middle brackets) (3) Spacing: the degree of coherence of recognition, select the wrong one, press alt to delete
11. Selection basic editing: 1. The common editing command of the selection is to select the area first, and then (1) right-click to find the “Transform Selection”/(2) Select the menu – Transform the selection; Handle points appear around the selection to deform the selection (right-click, multiple transformations), and click “✔” in the upper right corner to confirm the end of the transformation; Transform Unsatisfactory Point Cancel (ESC) Symbol2.Understand the transparency of the selection3.The connection between the selection and the pathSelection menu – Modify – Boundary – Make the boundary change the selection smooth – Smooth the sharp corners to expand/shrink – Scale the selection around the path – Convert the selection to a path (the selection is good, right-click “Create Working Path”).
12. History Tools1.History Panel Window Menu – History, the top of the panel is the original picture, the top of the panel is the early record, the bottom is the most recent record, and there are three buttons at the bottom (1) Create a new document from the current state (2) Create a new snapshot (3) Delete the current state Edit menu – Clean – History (a07 set the number of history times) 2. History shortcut key Ctrl+shift+z take a step back Click multiple times to take a step back or Ctrl+alt+z command returns multi-step, the corresponding steps in the history panel are grayed out to create a history document – can be backed up (panel) 3.history snapshot snapshot – save the state so that it is not replaced by a new step snapshot press twist / right-click to create a snapshot / 4.history
panel settings toolbar: the history brush tool (y) plays the role of restoring the original picture area5.history brush tool group
13. Brush Tool (B) Press shift to draw a straight line to change the foreground color to change the color of the brushBrush state Press Alt to pick up the color 2
You can change the size of the brush and change the hardness of the brush: “[]” or Alt+right-click to move horizontally to change the hardness of the brush: shift+[], or Alt+right-click to move vertically3.There are more other brushes in the Brush panel panel menu, and you can also load the brush panel menu by yourself – load the brush to draw graphics or pictures by yourself to customize the brush: Edit Menu – Define the brush preset and adjust the spacing, create a new brush preset; Defining Brush PresetsStoring Brush Files:Panel Menu,Storing Brushes4.Opacity and Flow Blending Modes are where changes are made to the mode we paintFlow:Flow speed of strokes (stackable)Airbrush:The longer you press, the more colors, the greater the rangeTwo buttons:Use pressure for opacity and size17:425.Tablet operation pressure to control brush transparency and size 19:53High Energy Painting6.Pencil Tool and Brush7.Eraser Tool (E)Similar to Brush(1)Eraser Erase Pixels on a Layer (2)Toggle Erase Mode from Eraser Options Bar (3)Erase to History, Same Effect as History Tool(4)Learn to Mask, Eraser Tool Hardly Uses (Try to Avoid) Background Eraser: Can intelligently erase the background to get the subject image Magic Eraser: Erase areas of similar colors
14. Repair Tools1.Blur Tool: Blur the image and blur the target area to open up the image and sense of distance2.Sharpen tool (as opposed to blur) makes the image sharp and clear3.Smudge tool (the same as the brush) The higher the smear intensity value, the stronger the smear effect
Tick the player to paint, you can draw the foreground color, shortcut key Alt4.Dodge + Burn + Sponge tool to protect the tone: it can protect the image from distorting the highlight in terms of hue when using dodge – biased towards the bright part; Midtones – not dark, not light shadows – bias to the shadow part of the sponge tool: locally increase saturation or decrease saturation saturation
: the vividness of the color reduces the saturation – can finally make the image close to black and white 5.The imitation stamp tool needs the imitation source to press the Alt key (the object to be imitated), after the cursor changes to the bull’s-eye, it means that you can find the imitation source, click to select the imitation source, and then click to draw 6.The pattern stamp tool draws the pattern directly on the screen,
7. Repair Brush Tool (J)
Shift+J switching, the usage is the same as the Imitation Stamp Tool, the Repair Brush has a certain intelligence, and can be integrated with the surrounding environment; Imitation stamps are stricter8.Spot repair brush tool Click on the stain and paint9.Repair tool:——You can quickly repair the picture,Same as the lasso tool,First select the area to establish a selection,Then drag the selection away10.The content-aware movement tool is smarter and simpler than the repair tool,Select the area first,Then release the mouse to calculate the mode:(1)Move-remove,(2)Expand-copy; Adaptation: Control the effect of edge blending11.The red-eye tool can be framed on the red eye15.The fill-fill tool and
commands can roughly fill in solid colors, gradients, and patterns1.The Paint Bucket tool (G) – can fill the foreground color and the hatch command: Edit Menu – Fill (shift+F5 or shift+back) is more extensive than the paint bucket usage2.Content-aware fill-(1)Content-aware filling—— There is a function of intelligent calculation, which should be used in combination with the selection(2)Fill the history of the primary color channel is represented by a grayscale image,Indicate the intensity of the light3.Gradient toolPoint lineDrag and hold down the mouse and move again,The line that appears represents the direction and length of the gradient4.The gradient editor can make any gradient effectClick on the preview effect directly to bring up the position, color, and transparency of the gradient editor color scale—control the gradient effect, and the color label can be added or deleted
The upper color scale adjusts the transparency, and the lower color scale adjusts the color5.Gradient tool options6.Gradient typeGradient
editorFive buttonsFive modes: Linear gradient, Mirror gradient (center spreads outward), Angle gradient, Symmetrical gradient, Diamond gradient (diamond in the middle)7.Fill layer Layer Layer Panel, the fourth button can be filled, it exists as a separate fill layer, can be adjusted, double-click the layer in the layer panel to bring up the fill color setting
16. Transform Transform: Enlarge and reduce the object, you can target the entire layer, or within the selection 1. Free Transform Editing Menu – Free Transform (Ctrl+T) Free Transform Control Box to control the effect of transformation, after the free transformation is over, there is a definite command control point to control the deformation, the reference point is the axis of transformation, (the reference point can be moved at will, or press the Alt key to position) The option bar becomes the free transformation parameter option to set the reference point position button, which can quickly and accurately locate the reference point. 2. The operation of the Move Transform is basically the same as that of the Move tool, and you can adjust the XY through the option bar to precisely control the movement of the object. △: The result of the reference point transformation should be applied (enter) or cancel (esc) 3.The transformation command again can quickly repeat the transformation operation. Edit Menu – Transform – Transform Again (Ctrl+Shift+T)Transform and Copy Again (Ctrl+shift+Alt+T)4.Object ZoomScale on the view, recalculate the pixels of the graph, and you can also do mirror flipEdit Menu-Transform-Scale (S)Press shift to zoom againLock the aspect ratioPress Alt to zoom on the reference point as the axisZoom out to the other side, and then go over and flip, or right-click – Flip horizontally/ Vertical flip (do reflection) history does not exist, you can use (1) Ctrl+z to restore (2) edit menu – restore vertical flip, this can only be restored one step, otherwise it will become redo vertical flip scaling can also be transformed again, repeat many times and copy and shrink after recalculation of pixels, and then enlarge the blur, which can be converted into smart objects (later)
3. Rotate transform
The option bar can control the precise rotation angle, press the shift key to lock the angle, change the position of the reference point at 15 degrees each time, and rotate it on different
axes4.Bevel transformation H: oblique cut
right-click-oblique cut, when the mouse becomes white label and double arrows, you can manually bevel the
operation5. Deformation Transform Options BarFinally, there is a deformation button Twist Transform control box for the Bezier Mesh Deformation Mode in 9 Palace format, there are many preset styles, deformation can not be transformed
again6.Distort Transform can only right-click – Distort to find the moving handles, locate the handles, complete the transformation operation, overlay the shape on another shape, use the Distortion Free Transform mode, press the Ctrl key to quickly enter the distortion mode, and the mouse will turn white when you are close to the handles7.
Perspective Transform: Directly drag the handles to position, follow the perspective rule
XVII.Channel Mask (Fried Chicken Important)1.Channel PanelTools Window Menu for Editing Channels – Four buttons below the Channel Channel Panel:Load the channel as a selection+Save the selection as a channel+Create a new channel+Delete channelThe upper right corner of the panel is the panel menuRGB:Composite channel is the composite effect of the primary color channel (Ctrl+2)Primary color channel: Red, green, and blue, represented by grayscale images, indicate the intensity of light in RGB color mode, white represents the highest color light intensity, with a value of 255; Black represents the lowest color light intensity, no light
, the value is 0 Ctrl+K Preferences-Interface, to modify the preview effect of the primary color channel, check the color display channel color mode, the channel composition is also different
2. Alpha channel PSD, TGA, TIFF and other format pictures can support alpha channel to write to alpha channel: a selection layer that records transparency. Black does not contain pixel information and represents transparency; White is 100% pixel coverage, representing opaque areas, different grayscales represent different transparency0=black=transparent1~254=gray=translucent255=white=opaqueNew
alpha channel: (1) Channel panel press to create a new one; (2) New panel menu; (3) Select the area on the screen, right-click – save the selection / press the twist 2 channel panel to put up to 56 channels 3. The relationship between the channel and the selection
is based on the channel built above (3), only black and white, no ant line, click the first button below to appear the ant line / right-click – load the selection / press Ctrl and click the layer or channel, and the selection can also appear
4. Edit the Alpha ChannelThe editing channel is the same as editing the layer, first select the area, edit the selection, and then press the first button to load the selection. The adjustment of grayscale pixels and the editing of shapes are to obtain the corresponding selection, and after loading the selection, the ant line changes, and the selection with feathering
5.
For the alpha channel processing, only the selection is changed Alpha channel = selection processing plant
6.The layer mask can hide and show part of the area on the layer, and in the layer mask editing state, it corresponds to a temporary alpha channel mask
= selection workshop
Layer Menu – Layer Mask – Select first, add a layer mask under the Layers panel (the first button), press Alt to add a mask between the layer mask and the original layer for the link relationship, you can get a mask that hides the selection; Press Alt to click on the mask thumbnail to show only the part of the mask, and then press Alt to return. In the mask: add a black hidden image, add a white display image. When you don’t want to use a mask: click on the mask, right-click – deactivate the layer mask, the layer mask can be temporarily disabled or enabled (shift+click mask)
The mask can be edited like a channel, but you can also adjust the mask Special command, right-click on the mask – adjust the mask, the same as the previous Adjust Edge panel7.The
quick mask is a temporary alpha channel, advantage: fast; and layer overlay, easy to view, but quick mask is a mode, the created selection is a normal temporary selection(1)Selection menu-edit in quick mask mode(Q)(2)Button under the toolbar(
3)Channel panel optionsThrough the options, you can modify the mask method and display areaColor type channel:You need to enter the channel to edit separately, and you can’t see the image on the screen
Please indicate:Free Editor Online Photoshop » Finally, there is a comprehensive set of online Photoshop tutorials! Learn Photoshop from scratch!!


 Gender Double Label Revealed 9 Illustrations Reveal the Invisible Rules Around Us!
Login to comment! If you already have an account, please first log in,No please registered or