

1. Create and save
New: ctrl + n generally select the pixel unit, the resolution, and the color mode can be changed according to the needs
Save: Ctrl + s Save as: Ctrl + shift + s
Export E
Combine slices and cut images and store them in the format used by the Web (animation can also be exported)
Right-click export of commonly used layers
(1) Quickly export to PNG
(2) Export as (ctrl + shift + alt + w)
Choose several times the size of the picture, change the value, etc.
png transparent background image
jpg picture
GIF animation
SVG> photoshop repeated editing (rarely used)
Right-click the layer to export the cutting method
Right-click the shape layer to quickly export to png format
Right click to export as
Smaller files are checked, it will compress the size but does not affect the clarity of the picture
The size of the exported canvas will change the size of the graphics. It will not change: the size of the canvas will be determined according to the actual situation.
2. Photoshop graphics composition method
The picture shown is presented in a way of overlaying layers
(1) Shape layer, (2) Smart object layer, (3) Text layer, (4) Picture layer
ctrl +]: move the layer up one layer ctrl + [: move the layer down one layer ctrl + shift +]: put the layer on the top
3. Understanding of bitmap vector diagram
Bitmap: After zooming in, the pixel grid will have jagged edges
Vector diagram: zoom in and out will not change, the vector diagram shows a position of points and lines
Bitmap tool
Vector diagram tool
4. Color editing color selection
Color mode: Image> Mode can be changed
CMYK: Cyan, Magenta, Yellow, Black
RGB: red, green, blue
Grayscale: black, white, gray
Foreground color: alt + delete
Background color: ctrl + delete
X: switch color
D: Restore the default black and white
Hue band
Change the color value
H: Hue
S: Saturation (the brilliant value of the color)
B: Brightness
: Is the hexadecimal color, the color on the code,
Only WEB color is checked to avoid color error
5. Mobile Tool V
Move tool: V-move element, alignment tool.
Automatic selection: tick to improve selection efficiency
Scaling problem
(1) If the display transform control is ticked, a transform rectangle (representing the size range of the figure) will appear in the selection graph or-(ctrl + t) to transform–commonly used
(2) Hold down (ctrl + shift) to change the side or corner, and other sides that are not involved will not change
(3) Press (alt) to build the center point to zoom and zoom in
(4) If you don’t press and only drag the mouse to zoom in or zoom out: it is a movement that does not change the position of the fixed corresponding point of the selected point.
(5) After the 2019 version, hold down (shift) to build deformation zoom, not press to zoom
Press ctrl to add and select layers or press shift to build in the work area to add and subtract layers
When an ant line appears on a layer, you can select other layers to align with it
6. Artboard tool V
Generate multiple artboards in the same artboard
The size of the artboard can be changed later
Artboard can be added or reduced
Multiple artboards can choose the alignment
Hold down the alt key to copy an artboard
Select an element in an artboard and hold down the alt key and drag it to another artboard of the same size, and it will appear in the same position
Can export a drawing board
7. Marquee selection tool
shift + alt center point to draw a circle
Selection and modification: boundary, smoothing (the selection becomes a round rectangle), expansion (enlargement), contraction (reduction), feathering,
Marquee tool: M
(Only works for ordinary layers)
Fill the foreground color: Alt + delete
Fill background color: Ctrl + delete
Function: (1) Distance measurement (2) Color can be filled in the selection box (3) Elements in the selection area can be deleted (4) Some functions can be restricted
(5) You can select the ratio or size of the rectangle to be drawn
8. Lasso tool L
Selection and masking attributes
Adjust the edge of the cutout to be more integrated and beautiful
The edge can be adjusted to make the edge part more comfortable
9. Quickly select tools
Quick selection tool W
Magic Wand Tool W
(1) Sampling size: the sampling size can be called according to the demand
(2) Tolerance value: the size of the color tolerance
(3) Anti-aliasing: relatively smoother, usually check mark
(4) Continuous: Control the color interval more finely, generally check the mark
10. Cutting tool group
Straighten attribute: draw straight along one side, it will be straightened and cropped
Content recognition (check on), the original size remains unchanged, and the edge content is filled
Crop tool: C-change the size of the canvas
Straighten and align (do not change the canvas size)
Perspective cutting tool: You can select a range by frame, then straighten it, and cut through the perspective cutting area
Slicing tool: cut the desired area in the canvas and use it in conjunction with the cutting image
Slice selection tool:
(1) You can delete, move, adjust the size of the slice of the slice tool, etc.
(2) The relationship between the upper and lower levels of the slice can be adjusted
(3) Horizontal division and vertical division: further refine the slice
11. Straw tool group I
Eyedropper tool: I-absorb color (absorb the color of the foreground)
f8: See the sampling point or measured value in the information window
Color sampler tool
(1) 1-10 color sampling points can be retained
(2) Press and hold alt to build and click the sampling point to clear the sampling point
(3) Press and hold the ctrl key to move the sampling point to change the sampling point
Ruler tool
(1) Straighten the layer: you can turn the picture into a horizontal or vertical picture
(2) Pull out a ruler line — can measure the size of the scale, width and height, etc.
Annotation tool
(1) The content of the annotation can be seen in the annotation information
(2) The color of the comment information point can be changed and deleted
(3) Open the comment window to see
Counting tool
(1) Numbers can be marked
(2) The size of the label can be set
12. Repair the brush J tool group
Blot Repair Brush Tool
Repair brush tool
Hold down the alt key to extract a certain location for use
Repair tool: select a certain area to replace and fill the image
Content-aware mobile tools:
Move the content and repair the original location
Red eye tool
Removal of red areas, often used to remove red eyes when taking pictures
13. Brush B tool group
Brush tool: B-use in conjunction with mask
Color replacement tool: the color will be changed, and the color will be changed according to the color of the foreground color at the position where the color is in effect, and the original texture will not change
Mixer brush tool: A blend of colors will appear, similar to a blur.
14. Imitation Stamp Tool Set
15. History brush
16. Eraser tool set
17. Gradient Tool Group
Gradient tool: Used in conjunction with the mask to fill with gradient colors.
18. Fuzzy Tool Group
19. Dodge and deepen tool set
20. Pen tool set
Pen tool—Hold down the AIT key” to directly convert to the conversion point tool
Pen tool—Hold down the ctrl key “you can directly switch to the direct selection tool (small white tool)
Pen tool P
The default is path, generally used to draw shapes
Can draw shapes
Can draw a selection (only available after ctrl + enter from the path)
It’s much more convenient to check the rubber band
Anchor points can be added or deleted directly in the path
Pen tool stroke attributes: select different line methods, as well as changes in alignment, endpoints, and corners
Adjust the spacing of the dashed lines of the stroke, etc.
Free pen tool
You can draw the path you want at will
The magnetic tick is the same principle as the magnetic lasso tool
You can quickly hook some irregular graphics, which is very convenient and practical
Convert point tool
Is the conversion of anchor points and sharp corners
21, text tool group
Text tool: T-input text
Right-click attribute of text layer
Right-click the text to copy CSS or copy SVG: copy the text code, this code contains information such as the size, spacing, and color of the text
The corresponding attribute of the text that appears on the right-click of the layer
Create a working path,
Convert the text to: (convert to shape), you can design and make the text
Converted into paragraph text or text deformation can be designed according to the changes to the text
22. Path selection tool group A
Move to edit or change attributes
Path selection tool
Xiao Hei
Select the entire shape individually
Generally select all layers: In special circumstances, if you only want to change the current layer, select the current layer
Direct selection tool: Xiaobai
Select one point or multiple points individually (to move or delete points)
If you don’t select all, you can’t move a whole graph, you can only move the selected anchor points or edges
23. Shape Tool Group
Hold down the shift key: draw squares, circles, etc.
Shape tool: U-can draw regular shapes
Rectangles, rounded corners, and circles can be converted to each other by changing the attribute values
shape
Shape attribute: the default is shape
Set value
The attributes of drawing different shapes are different, you can change the value of the shape in the attributes
Rotation properties of the shape will become regular properties
Mask attributes can be used
path
A path with anchor points, you can create a selection, you can create a shape
The path can also be changed to a shape
Pixel
If the pixels are drawn, you will get a bitmap
When selecting pixels, create a new layer first, and draw a bitmap: mode, opacity, anti-aliasing
Polygon tool
Change the value of the side to get the shape of the corresponding side number
Line tool
Change the value according to the effect you want
Line with arrow: draw a line “find the icon of the setting in the property bar” find the panel and adjust it to the effect you want
Custom shape tool
You can keep the commonly used graphics in it for later use
Retain the method of drawing graphics: draw a shape “Edit” Custom Shape “Reserve for naming, you can find it in the custom shape
Often keep some linear icons, logos, vector shapes, etc.
Right-click properties of shape layers
The code of the shape has data such as color value and length
Copy shape attributes
Paste shape attributes
Merged shape: will be overwritten with the top color and attribute, and become the unified color and attribute above
ctrl + shift + alt + E: merge the layers and create a new merged layer, the original layer remains unchanged
ctrl + E: merge layers
Layer marker color
24. Right-click properties of the smart object layer
(1) Master the properties of the right button of the smart object layer
ctrl + J copy a smart object, change the color of one, and change the other
Perform the graphics of a smart object: create a new smart object by copying, and change one of the smart objects later, and the other will not change
Create a new smart object by copying
The intelligent layer is equivalent to the vector layer, and it will not be blurred when zooming in and out
Can be made into the form of sub-files: it is equivalent to seeing the effect in the big picture and processing the details in the small picture
(2) Understand the usage of smart objects
(3) Master the synchronization of smart object files
Right-click to replace the content of the smart object: click to replace the content, find the file to be replaced, replace it, and it can be replaced
Create a clipping mask: use the effect of a smart object to act on a layer to display
25. (Boolean operation)
Conditions for Boolean operations
(1). Shapes must be used, (the smart object is displayed in the lower right corner of the layer)
(2). There must be more than two shapes with intersecting parts, and to merge, merge the layers: ctrl + e, you can do Boolean operation after merging the layers
Boolean operations can be used together with these three attributes
Shape combination attributes in photoshop
1. Path operation attributes
2. Alignment properties
The shape is regularized, aligned, distributed and integrated
3. Arrange the attributes
Change the internal position adjustment of the shape graphics
Use the shape tool and hold down the shift key to add a new shape (merge shape) to the shape layer
Hold down the Alt key to subtract a new shape from the shape layer (minus the top shape)
Black and Boolean operations are used together: Black (CTRL + T): You can move the merged layer of two or more shapes to the layer in it, you can change the size, rounded corners, and color independently.
Shape tool “small black tool” hold down the alt key “to copy graphics in the same layer Ctrl + c, paste the layer Ctrl + v, change-change graphics Ctrl + t” can be aligned operation
You can also select the desired graphics in the merged layer ctrl + e, and ctrl + j to copy a part of the desired layer.
There is a path combination tool at the top of the menu: you can try different path combinations and experience the effects of Boolean operations on different path combinations.
26. Hand tool H
Change the canvas size and use it with the space bar
Rotate View Tool R: You can rotate the canvas at any angle
Reset view: return to the original angle
Rotate all windows and check: all open window canvases will be rotated by the same angle, and the rotation angle can be changed arbitrarily
27, magnifying glass tool
In the preferences, change to use the scroll wheel to zoom and you can use the mouse wheel to zoom in and out of the canvas
Zoom all windows tick: all open windows will be zoomed uniformly
28, toolbar custom editing
Master tool customization: You can add tools to delete tools to make the toolbar more concise and practical
Edit the options of the toolbar and find the custom edit: three small dots in the toolbar “right click “Edit Toolbar” tools that are not used can be placed in the additional tools (the custom toolbar can change the display and hide of the tools on the left) )
Restore the default value, it will return to the toolbar state when the software was installed
29, layer filter
Layer filter: filter the layer
Layer “Type: Select a certain type of layer, which can be quickly deleted and changed
Used to find the specified type of layer in multiple layers to change or edit
Image layer filter, adjustment layer filter, text layer, text layer filter, smart object layer filter, etc.
30. Layer transparency
Opacity: Decrease the transparency of the entire layer
Fill: Reduce the reduction of the fill color within the entire path, or the texture of the image itself, and the stroke color will not change
31. Layers
30. Layer transparency
Opacity: Decrease the transparency of the entire layer
Fill: Reduce the reduction of the fill color within the entire path, or the texture of the image itself, and the stroke color will not change
31, layer mask
Usage principle: white display and black hide> often used in synthesis
32. Layer link layer grouping
Linked layer is added to the layer (two or more can be moved together)
Layer connection
Linked together can move together
Layer group ctrl + G: Create a new group, if you create a layer mask for the group, it can act on the pictures in the group
33. Layer hiding function attributes
Master the click to expand function in different areas of the layer
Text layer: double-click the text to change the size and attribute of the word, double-click the right side of the layer to open the layer style
Shape layer: double-click to change the color, double-click the right side of the layer to open the layer style
Smart object layer: Double-click to enter the subfolder, double-click the right side of the layer to open the layer style
Bitmap layer: double-click to display the layer style, double-click the right side of the layer to open the layer style
Master the right-click properties of layers: the settings of large, medium and small thumbnail
34, normal group mixed mode
(1) Master the normal mixed mode
(2) Master the dissolution and mixing mode
(3) Master the distinction between mixed modes
The default is the normal place is the mixed mode
Blending mode (conditions need to have two layers): it can make a color change without changing the original graphic hue and texture
Dissolve: only aim at the edge effect and make grainy changes to the edge
35. Darken group blending mode
Darken group blending mode
The background graphics color is further deepened, and all the white areas are cleared, leaving only the dark areas
Example
Blending mode-darken
There is no color blending with the background
There is a hue change in the middle
Blending mode-multiply
Commonly used as projection, let the projection and the background color merge
Often used
Deepen the color, the hue will not change
Blending mode-color deepening
Increase the saturation of the color hue, clear the bright color area,
Hybrid mode-linear deepening
Pure black is preserved
Often used
Blending mode-dark
Dark colors only keep dark areas
There is no color blending with the background
36. Brightening group mixed mode
The overall color is brightened, the bright part is retained, and the dark color is cleared or the dark color is made transparent
Example
Blending mode-brighten
The white area is reserved, and the color of the gray area changes
Blending mode-color filter
The black and gray gradient is to produce a transparent gradient
Remove dark colors
Blending mode-color dodge
Blending mode-linear dodge
Blending mode-light color
Keep all the bright colors, clear all the dark colors
37, superimposed group blending mode
Example
Blending mode-overlay
(1) The saturation will change to a certain extent, and the obvious contrast between light and dark will be retained.
(2) The dark part will be brightened, and the bright part will be colored
(3) Do some cool effects to achieve a strong contrast between light and dark
(4) Make the colors more vivid
Blending mode-soft light
(1) Relatively soft
(2) Do some simulant effects
Mixed mode-strong light
Blending mode-bright light
(1) Mention all colors to a higher saturation
(2) Make all the bright parts brighter
Hybrid mode-linear light
The gray area merges with the background
Black and cyan produce a color gradient, cyan to white produce a gradient
Blending mode-point light
Blending mode-real color blending
It is equivalent to the transition of black, white and gray areas to produce more obvious color blocks, which are distinct and clear
38. Difference group mixed mode
Example
Mixed mode-difference
Mixed mode–exclude
Blending mode – subtract
Mixed mode-division
Dark colors become brighter, bright colors become transparent, and intermediate colors become bright colors
39. Hue group blending mode
Blending Mode-Hue
(1) The overall hue changes according to the selection of the background color
(2) The change is to change the color of the color part in the picture
Blending mode-saturation
(1) The upward saturation is strengthened, and the downward saturation is reduced
(2) Mainly used to increase saturation
Blending mode-color
(1) Somewhat similar to hue
(2) There is a difference in brightness
Mixed mode-lightness
(1) Changes in brightness
40. Layer blending options
Use of layer advanced blending options
Use of Advanced Hybrid Hollowing
Knockout can show the effect of the background through the layer
Layer style
Right-click the Three Musketeers: It has a great auxiliary effect on the layer style
1. Copy layer style: C-ctrl + shift + alt + c
2. Paste layer style: V-ctrl + shift + alt + v
3. Clear layer style: D-ctrl + shift + alt + d
41. Beveled relief layer style
Bevel relief layer style
Illumination range
Light setting
Contour: Choose different contours, the direction of the light will change, the first one is selected by default, the 45-degree contour
Texture: It is equivalent to the beveled relief and texture effect, the texture will also produce a three-dimensional effect
42. Stroke layer style
Stroke layer style
Zoom: adjust the color effect of the transition
43. Inner shadow layer style
Choose the color according to the object, reduce the brightness of its own color
Global light: Only one light source can be determined, and there can be light sources in multiple directions without checking. (Remove the global light, otherwise it will affect the later stage)
Mixed mode Generally choose multiply: it will be more integrated
44. Inner luminous layer style
The inner light cannot change the angle, the inner shadow is angled
The variegated color makes the blur effect grainy
The range is the degree of blurring of the edge of the light
45. Glossy layer style
Blending mode adjustment and color change, gloss angle, adjust according to your needs: size, reflective gloss effect, blur range, etc.
46. Layer style of color overlay
Equivalent to color fill
Generally used to change the color of bitmaps or smart objects
47. Gradient overlay layer style
The dithering check is relatively speaking to ease the tolerance
Change the blending mode according to the effect you need
There are more three-dimensional effects
48. Outer luminous layer style
Glowing effect from the side to the outside
49. Projection layer style
The shadow effect can be moved by dragging the size of the shadow
Shadow and inner shadow, shadow is the shadow outside the object, and inner shadow is the shadow inside the object
50. Reset layer style
Want to get the default parameters of photoshop: find
Find f(x) and click to reset the default list: restore to the original parameters
Can keep the effect suggestion style gallery
The style can be applied to another picture
You can save the style, you can send it to others, or you can use the created style by loading
51, fill group layer adjustment
Adjustment layer button: equivalent to window adjustment
52, image clarity adjustment
adjust
Brightness/contrast adjustment layer
Level adjustment layer: ctrl + l
Curve adjustment layer: ctrl + m
Exposure adjustment layer
53, image color adjustment
Natural saturation adjustment layer
Hue and saturation adjustment layer
Color balance adjustment layer
Black and white adjustment layer
Can change a certain color
Photo filter adjustment layer
Change the style of the whole picture
Channel mixer adjustment layer
Three channels of red, green and blue can be set
Color search adjustment layer: to achieve the effect of filter
54. Image tone adjustment
Inverted adjustment layer: make an upside-down replacement of the color
Tonal separation adjustment layer: make some special effects, oil painting or watercolor feeling
Threshold adjustment layer: clear all the colors of the picture and leave only black and white to achieve the effect of sketching
Gradient mapping adjustment layer
(1) It is equivalent to coloring the black, white and gray picture, and select the desired color to color
(2) Click on the dithering
Optional color adjustment layer
You can adjust the color cast in the entire screen
55. Edit menu common attributes
Define brush
Define pattern
ctrl + shift + alt + T: can copy equidistant images
56. Select the common attributes of the menu
Select menu common attributes
Select the color range of the menu
57. Common Settings of View Menu
View menu to create a new reference line drawing board: you can adjust the number and distance of the reference line, etc.
Can generate reference lines based on graphics
58. Use of timeline window
Functional attributes
Window》Timeline
Video timeline
Frame action production
Create frame animation
59. Commonly used filters
59-1, the filter is blurred
Blurred surface
(1) Frequently used as the refinement of characters
(2) Radius value: the higher the value, the blurring of scenes other than the characters can be partially blurred
(3) Threshold: the larger the threshold, the larger the blur range
Motion blur: a picture that can make a sense of motion and speed
Gaussian Blur: the performance of the blur is more intense
Can achieve the blur effect of projection
Radial blur: make a texture effect
59-2. Filter noise
Reduce noise
Add noise
Quantity refers to how grainy
Often make some textures
Noise should be checked, if it is not checked, multiple colors will appear
Evenly distributed: the graininess made is more regular
Gaussian distribution: the graininess made is more random
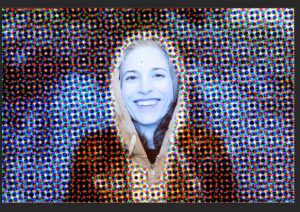
59-3. Pixelate filter
The color matching method uses adjacent colors for color matching
It can be used to extract the main color blocks of a picture (using pixelation to achieve the effect of mosaic)
Color halftone
Crystallization
Please indicate:Free Editor Online Photoshop » Overview of basic functions of toolpic


 Gender Double Label Revealed 9 Illustrations Reveal the Invisible Rules Around Us!
Login to comment! If you already have an account, please first log in,No please registered or