

the egg in the effect picture is composed of bubbles and light yellow. The process is also relatively simple. After selecting bubbles,
use the deformation tool to change into the shape of an egg, then blend in the light yellow, and adjust the details
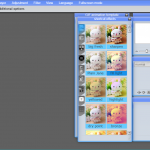
final effect, cool or not ha ha ha
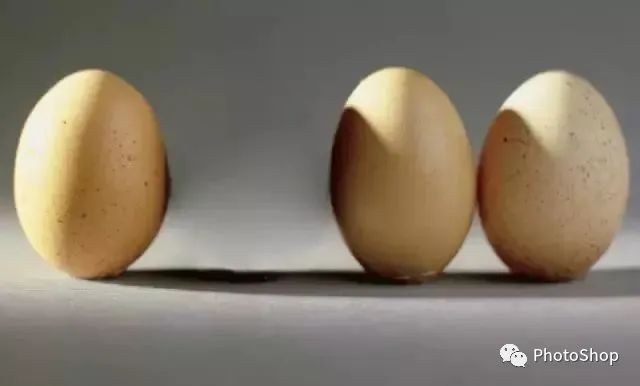
I. open the material picture in Photoshop

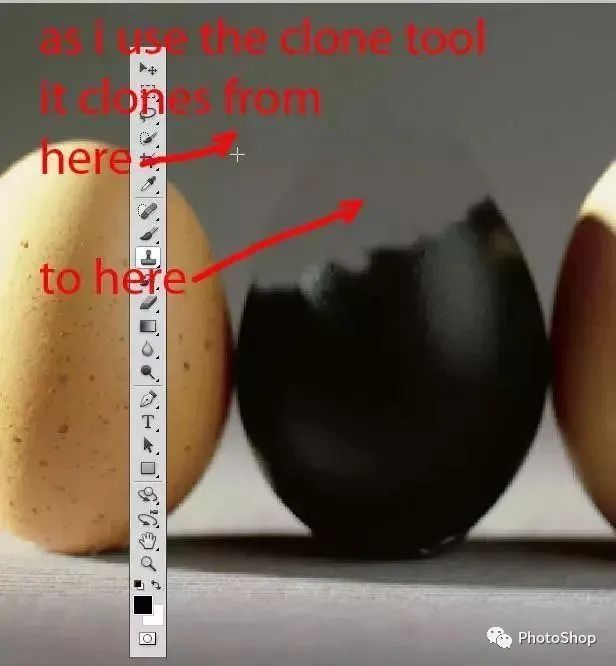
2. Copy one layer of the background layer, and select the imitation stamp tool to smear the black egg
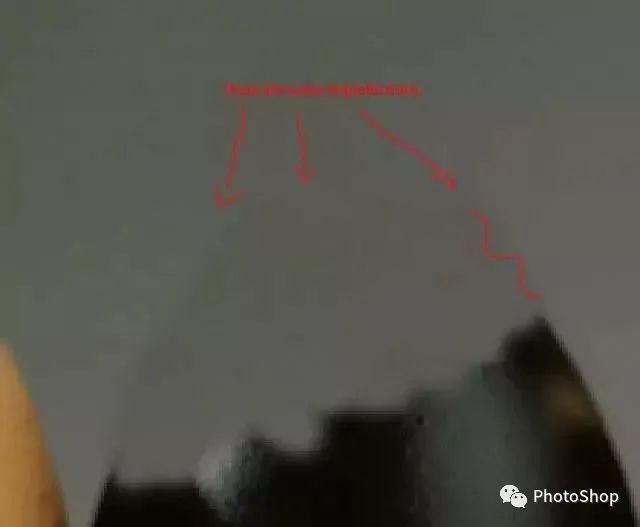
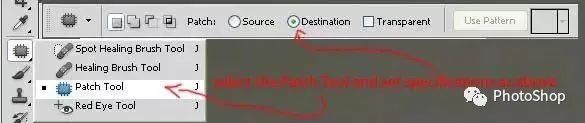
III. remove the obvious traces on the edges with repair tools

 …………………………………………………………..
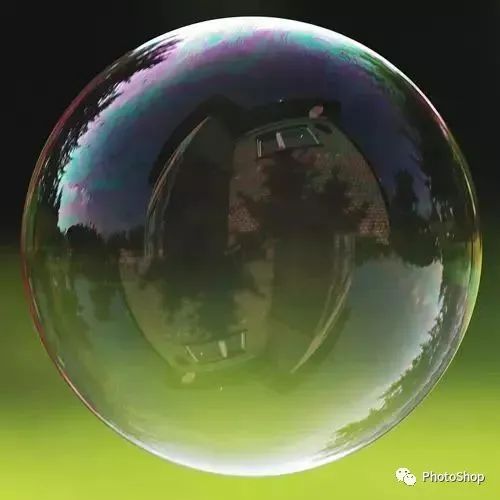
4. Open the bubble material
 …………………………………………………………..
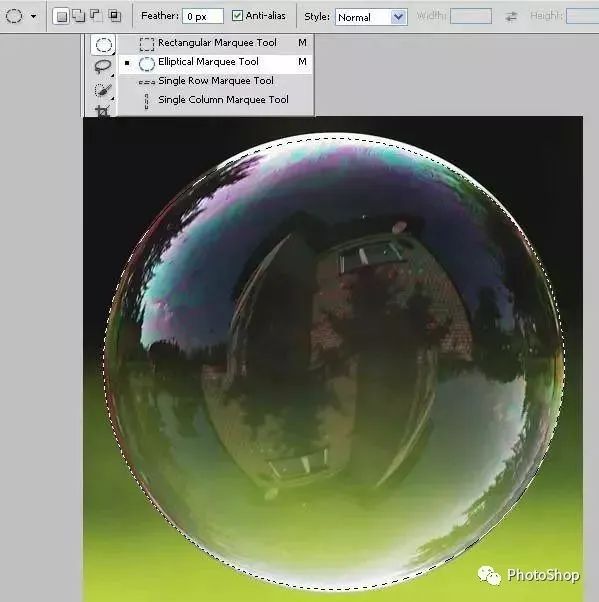
v. select the ellipse box selection tool to select the required part
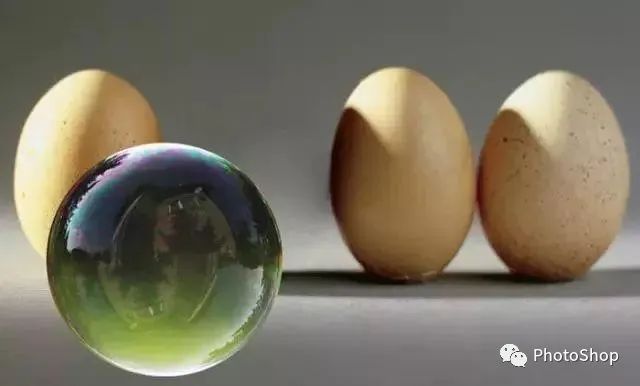
VI. move the selected bubble to the egg file and adjust it to the position of the black egg
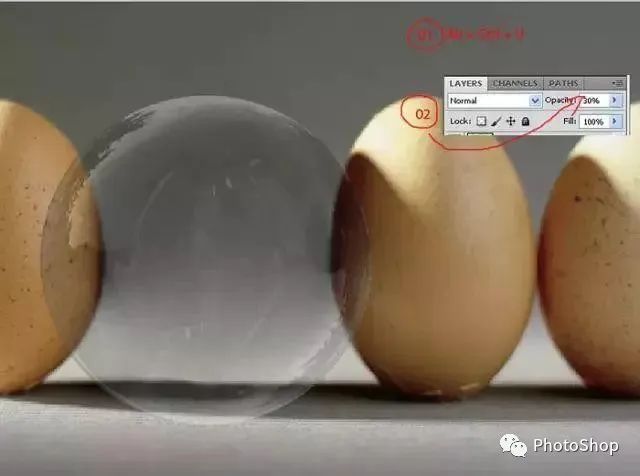
VII. Press Ctrl + Shift + u to remove the color of the bubble and change the opacity to 30%, as shown in the following figure
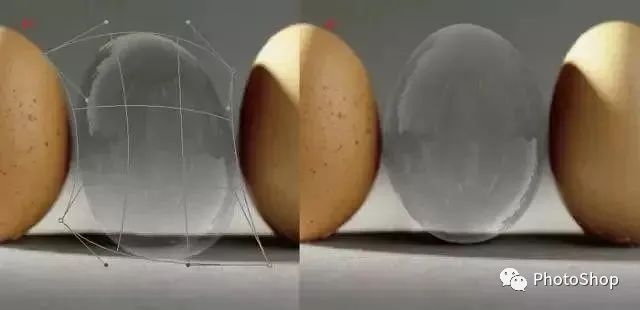
VIII. Press Ctrl + T, right-click to select “deformation”, and adjust each node to achieve an egg like effect</ span>
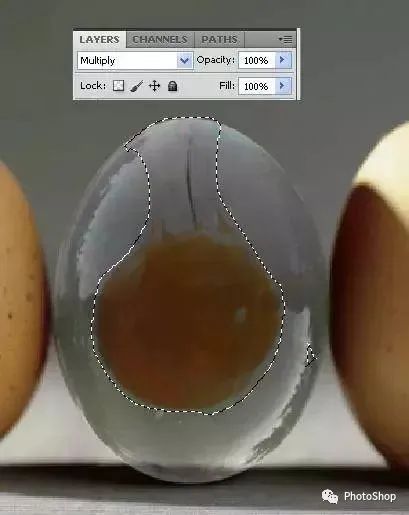
IX. open the light yellow material, drag it in to adjust the size, then add a layer mask, smear the unwanted parts with a black brush, and change the mixing mode to “positive Overlay”</ span>

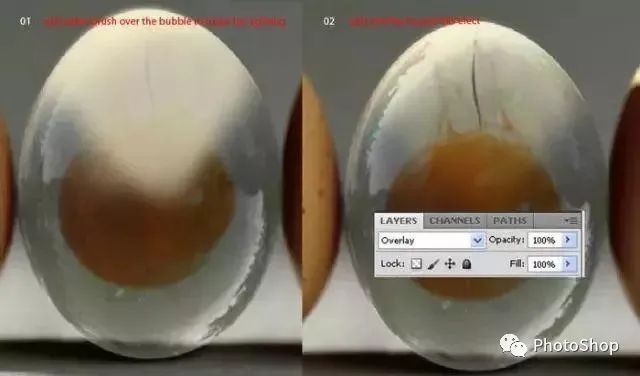
X. use the brush tool to smear bright yellow on the top of the egg, and change the mixing mode to “superposition” to make it look bright</ span>
Xi. Use the gradient tool to create a pink to yellow gradient background, and change the layer blending mode to “soft light” to make its color more atmosphere</ span>
final effect:
does the transparent egg seem to have an appetite
learn it quickly. Using this method to draw inferences from one instance, you will think of many interesting effects oh </ span>
Please indicate:Free Editor Online Photoshop » Photoshop Tutorial – synthesizing transparent eggs


 Gender Double Label Revealed 9 Illustrations Reveal the Invisible Rules Around Us!

Login to comment! If you already have an account, please first log in,No please registered or