

in our daily life and work, we will encounter the following problems more or less:
the size of the picture is too large. What should I do if I want to make it smaller</ span>
what if you want to turn a rectangular picture into a circle</ span>
this picture has watermark, how to remove the watermark</ span>
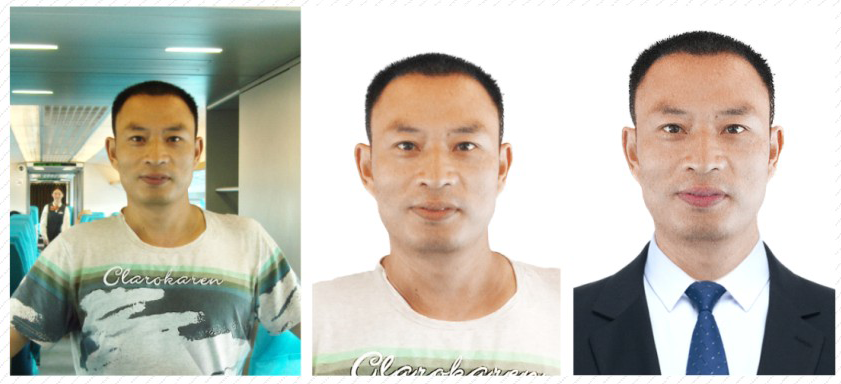
if you don’t have time to take photos, what if you need certificate photos urgently</ span>
what if the pictures downloaded online cannot be opened?
……
in fact, if you know PS software, it won’t waste you too much time. These problems can be easily solved with PS. Mr. Lin collected some of the most frequent problems you encounter in your daily work and developed this set of < / span > < span > < strong > PS image processing technology necessary for workplace work < / strong > < / span > < span > < span >, hoping to help you</ span>
let’s take a look at the syllabus of this set of courses, as follows:
< strong > < span > lesson 1: life photo making certificate photo </span > < / strong >
 < strong > < span > lesson 3: change the suit for the certificate </span > < / strong >
 < strong > < span > lesson 4: optimize the size of photos to meet the upload requirements < / span > < / strong > < span >
 < / section > < section > < section > < strong > < span > lesson 5: Tips for quickly converting picture formats < / span > < / strong > < / section > < section > < span > 1 Explanation of common formats of webp, TGA, JPEG, PNG and GIF < / span > < / section > < section > < span > 2 Use affinity Photo software to convert < / span > < / section > < section > < span > 3 Use PS to convert some special picture formats < / span > < / section > < section > < span > 4 Using format factory conversion, it is particularly easy to use < / span > < span > < / span > < section > < section > < / section > < section > < strong > < span > Lesson 6: rectangular photos become circular photos < / span > < / strong > < / section > < section > < span > 1 Use word software to convert circular pictures
 < / section > < section > < / strong > < span > Lesson 8: extract the company logo from the picture and use it on the file </span > < / strong > < / section > < section > < span > 1 How to use PS pen tool
 < / section > < section > < / strong > < section > < strong > < span > Lesson 9: how to make blurred photos clearer </span > < / strong > < / section > < section > < span > 1 PS high contrast retention improves photo sharpness
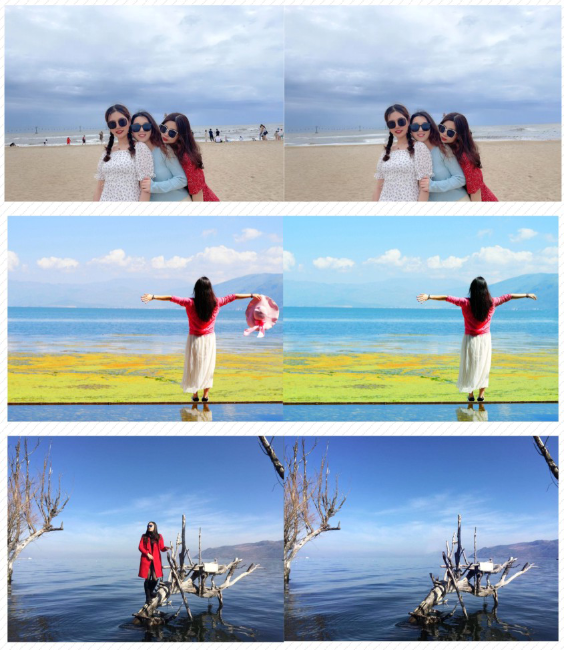 < / section > < section > < / strong > < span > Lesson 11: product drawing, more selling (2) < / span > < / strong > < span >
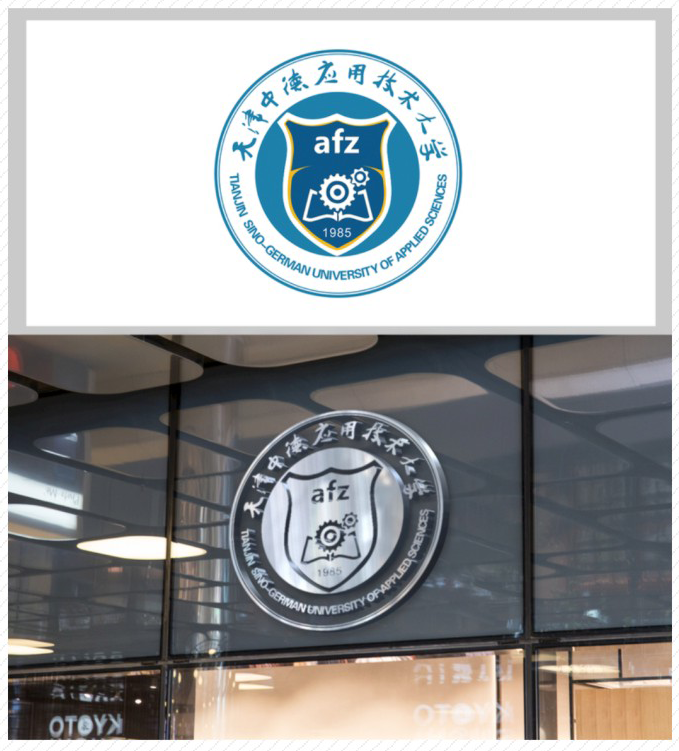 < / section > < section > < / strong > < section > < strong > < span > Lesson 12: you can’t find suitable materials for PPT, use PS to do it yourself < / span > < / strong > < / section > < section > < span > 1 Make the material, and set the size according to the width height ratio of the slide < / span > < / section > < section > < span > 2 Comprehensively use PS color matching command, filter Layer blending mode production < / span > < / section > < section > < / section > < section > < / section > < section > < span > < strong > extra gift: make a shiny image for yourself (55 minute course) < / strong > < / span > < / section > < section > < / section > < section > < / section > < section > < section > < strong > < span > < PS image processing technology necessary for workplace work < / span > < / strong > < / section > < section > < span > < span > 13 PS video courses < / span > < / section > < section > < span > there are also teacher tutoring and Q & A < / span > < / section > < section > < span > the original price is 99 yuan, < / span > < span > a limited time discount of 19 yuan < / span > < / section > < section > < span > ↓↓ wechat scanning code, you can learn for a long time ↓↓ < / span > < / section > < section > < / section > < section > < span > < section > < span > < span > < span > < any questions, Add teacher wechat: buluowojiaoyu consultation < /section>
Please indicate:Free Editor Online Photoshop » Summary of Photoshop mapping skills for daily office work in the workplace


 Gender Double Label Revealed 9 Illustrations Reveal the Invisible Rules Around Us!

Login to comment! If you already have an account, please first log in,No please registered or