

 Toolbox
(If multiple tools share a shortcut key, press [Shift] at the same time to add this shortcut key to select)
Rectangle and ellipse marquee tool 【M】
Cutting tool 【C】
Moving tool 【V】
Lasso, polygonal lasso, magnetic lasso 【L】
Magic Wand Tool 【W】
Spray gun tool 【J】
Brush tool 【B】
Elephant seal, pattern stamp 【S】
History brush tool 【Y】
Elephant skin wipe tool 【E】
Pencil, straight line tool 【N】
Blur, sharpen, smear tool 【R】
Lightening, darkening, sponge tool 【O】
Fountain pen, free fountain pen, magnetic fountain pen 【P】
Add anchor point tool 【+】
Delete anchor point tool 【-】
Direct selection tool 【A】
Text, text mask, vertical text, vertical text mask 【T】
Measuring tool 【U】
Straight gradient, radial gradient, symmetric gradient, angle gradient, diamond gradient 【G】
Paint bucket tool 【K】
Straw, color sampler 【I】
Hand tool 【H】
Zoom tool 【Z】
Default foreground and background color 【D】
Switch the foreground and background colors 【X】
Switch between standard mode and quick mask mode [Q]
Standard screen mode, full screen mode with menu bar, full screen mode 【F】
Temporarily use the move tool [Ctrl]
Temporarily use the color suction tool 【Alt】
Temporary use of the hand tool [Space]
Open the tool options panel [Enter]
Quickly enter tool options (there is at least one adjustable number in the current tool options panel) [0] to [9]
Cycle selection of brushes 【[】or【]】
Select the first brush 【Shift】+【[】
Select the last brush 【Shift】+【】】
Create a new gradient (in “Gradient Editor”) 【Ctrl】+【N】
2. File operations
New graphic file 【Ctrl】+【N】
Create a new file with default settings 【Ctrl】+【Alt】+【N】
Open the existing image 【Ctrl】+【O】
Open as… [Ctrl]+[Alt]+[O]
Close the current image 【Ctrl】+【W】
Save the current image 【Ctrl】+【S】
Save as… [Ctrl]+[Shift]+[S]
Save a copy 【Ctrl】+【Alt】+【S】
Page Setting [Ctrl]+[Shift]+[P]
Print 【Ctrl】+【P】
Open the “Preferences” dialog box 【Ctrl】+【K】
Display the last displayed “Preset” dialog 【Alt】+【Ctrl】+【K】
Set the “General” option (in the preset dialog box) 【Ctrl】+【1】
Set “Save File” (in the preset dialog box) 【Ctrl】+【2】
Set “Display and Cursor” (in the preset dialog box) [Ctrl]+[3]
Set “transparent area and color gamut” (in the preset dialog box) [Ctrl]+[4]
Set “Unit and Ruler” (in the preset dialog box) [Ctrl]+[5]
Set “reference line and grid” (in the preset dialog box) 【Ctrl】+【6】
Set “Effect Tool and Temporary Storage Disk” (in the preset dialog box) [Ctrl]+[7]
Set “Memory and Image Cache” (in the preset dialog box) [Ctrl]+[8]
Edit operation
Undo/Redo the previous operation 【Ctrl】+【Z】
Restore more than two steps 【Ctrl】+【Alt】+【Z】
Redo more than two steps [Ctrl]+[Shift]+[Z]
Cut the selected image or path 【Ctrl】+【X】or【F2】
Copy selected image or path 【Ctrl】+【C】
Combined copy 【Ctrl】+【Shift】+【C】
Paste the contents of the clipboard into the current graph [Ctrl]+[V] or [F4]
Paste the contents of the clipboard into the selection box [Ctrl]+[Shift]+[V]
Free transformation 【Ctrl】+【T】
Apply free transform (in free transform mode) 【Enter】
Transform from the center or symmetrical point (in free transform mode) 【Alt】
Restriction (in free transform mode) 【Shift】
Distortion (in free transform mode) [Ctrl]
Cancel deformation (in free transform mode) 【Esc】
Freely transform the copied pixel data 【Ctrl】+【Shift】+【T】
Transform the copied pixel data again and create a copy 【Ctrl】+【Shift】+【Alt】+【T】
Delete the pattern in the selection box or the selected path 【DEL】
Fill the selected area or the entire layer with background color [Ctrl]+[BackSpace] or [Ctrl]+[Del]
Fill the selected area or the entire layer with the foreground color [Alt]+[BackSpace] or [Alt]+[Del]
The “Fill” dialog box pops up 【Shift】+【BackSpace】
Fill from the history record 【Alt】+【Ctrl】+【Backspace】
3. Image adjustment
Adjust the color scale 【Ctrl】+【L】
Automatic adjustment of color scale 【Ctrl】+【Shift】+【L】
Open the curve adjustment dialog 【Ctrl】+【M】
Add a new point on the curve of the selected channel (in the ‘Curve’ dialog box) and click [Ctrl] in the image
Add new points on all curves except the compound curve (in the ‘Curve’ dialog box) [Ctrl]+[Shift]
Add point and press to move the selected point (in the ‘Curve’ dialog box) 【↑】/【↓】/【←】/【→】
Move the selected point by 10 points in increments of 10 points (in the ‘Curve’ dialog box) 【Shift】+【Arrow】
Select multiple control points (in the ‘Curve’ dialog box) [Shift] and click
Move the control point forward (in the ‘Curve’ dialog box) [Ctrl]+[Tab]
Move the control point back (in the ‘Curve’ dialog box) [Ctrl]+[Shift]+[Tab]
Add a new point (in the ‘Curve’ dialog box) Click on the grid
Delete point (in the ‘Curve’ dialog box) [Ctrl] Add point and click
Cancel selection of all points on the selected channel (in the ‘Curve’ dialog box) 【Ctrl】+【D】
Make the curve grid finer or coarser (in the ‘Curve’ dialog box) [Alt] Add a click to the grid
Select the color channel (in the ‘Curve’ dialog box) [Ctrl]+[~]
Select the monochrome channel (in the ‘curve’ dialog box) [Ctrl]+[number]
Open the “Color Balance” dialog box 【Ctrl】+【B】
Open the “Hue/Saturation” dialog box [Ctrl]+[U]
Full image adjustment (in the Hue/Saturation” dialog box) [Ctrl]+[~]
Only adjust red (in the Hue/Saturation” dialog box) [Ctrl]+[1]
Only adjust yellow (in the Hue/Saturation” dialog box) [Ctrl]+[2]
Adjust only the green color (in the Hue/Saturation” dialog box) [Ctrl]+[3]
Only adjust the cyan color (in the Hue/Saturation” dialog box) [Ctrl]+[4]
Only adjust blue (in the Hue/Saturation” dialog box) [Ctrl]+[5]
Only adjust magenta (in the Hue/Saturation” dialog box) [Ctrl]+[6]
Decolorization 【Ctrl】+【Shift】+【U】
Reverse 【Ctrl】+【I】
Layer operation
Create a new layer from the dialog box 【Ctrl】+【Shift】+【N】
Create a new layer with default options [Ctrl]+[Alt]+[Shift]+[N]
Create a layer by copying 【Ctrl】+【J】
Create a layer by cutting 【Ctrl】+【Shift】+【J】
Group with the previous layer 【Ctrl】+【G】
Cancel grouping 【Ctrl】+【Shift】+【G】
Downward merge or merge join layers 【Ctrl】+【E】
Combine visible layers 【Ctrl】+【Shift】+【E】
Stamp or stamp the connected layer 【Ctrl】+【Alt】+【E】
Stamp visible layer 【Ctrl】+【Alt】+【Shift】+【E】
Move the current layer down one layer 【Ctrl】+【[】
Move the current layer up one layer 【Ctrl】+【]】
Move the current layer to the bottom 【Ctrl】+【Shift】+【[】
Move the current layer to the top [Ctrl]+[Shift]+[]]
Activate the next layer 【Alt】+【[】
Activate the previous layer 【Alt】+【]】
Activate the bottom layer 【Shift】+【Alt】+【[】
Activate the top layer 【Shift】+【Alt】+【]】
Adjust the transparency of the current layer (the current tool has no digital parameters, such as the move tool) [0] to [9]
Keep the transparent area of the current layer (switch) 【/】
Projection effect (in the “Effect” dialog box) 【Ctrl】+【1】
Inner shadow effect (in the “Effect” dialog box) 【Ctrl】+【2】
Outer glow effect (in the “Effect” dialog box) 【Ctrl】+【3】
Internal glow effect (in the “Effect” dialog box) [Ctrl]+[4]
Bevel and relief effects (in the “Effects” dialog box) 【Ctrl】+【5】
Apply the currently selected effect and make the parameters adjustable (in the “Effect” dialog box) 【A】
4. Layer blending mode
Cycle selection of mixed mode 【Alt】+【-】or【+】
Normal 【Ctrl】+【Alt】+【N】
Threshold (Bitmap mode) 【Ctrl】+【Alt】+【L】
Dissolve 【Ctrl】+【Alt】+【I】
Behind [Ctrl]+[Alt]+[Q]
Clear 【Ctrl】+【Alt】+【R】
Multiply the bottom of the positive film 【Ctrl】+【Alt】+【M】
Screen 【Ctrl】+【Alt】+【S】
Overlay 【Ctrl】+【Alt】+【O】
Soft light 【Ctrl】+【Alt】+【F】
Bright light 【Ctrl】+【Alt】+【H】
Color reduction 【Ctrl】+【Alt】+【D】
Deepen the color 【Ctrl】+【Alt】+【B】
Darken 【Ctrl】+【Alt】+【K】
Brighten 【Ctrl】+【Alt】+【G】
Difference 【Ctrl】+【Alt】+【E】
Exclude 【Ctrl】+【Alt】+【X】
Hue 【Ctrl】+【Alt】+【U】
Saturation 【Ctrl】+【Alt】+【T】
Color 【Ctrl】+【Alt】+【C】
Luminosity 【Ctrl】+【Alt】+【Y】
Decolorization Sponge tool+[Ctrl]+[Alt]+[J]
Add color Sponge tool+【Ctrl】+【Alt】+【A】
Dark tone Dodge/Burn Tool+【Ctrl】+【Alt】+【W】
Midtones Dodge/Burn Tool+【Ctrl】+【Alt】+【V】
Highlight Dodge/Burn Tool+【Ctrl】+【Alt】+【Z】
5. Select function
Select all 【Ctrl】+【A】
Cancel selection 【Ctrl】+【D】
Reselect 【Ctrl】+【Shift】+【D】
Feather selection 【Ctrl】+【Alt】+【D】
Reverse selection 【Ctrl】+【Shift】+【I】
Path selection area [Enter] on the numeric keyboard
Load selection [Ctrl]+click the thumbnail in the layer, path, channel panel
6 filters
Press the last parameter to do the last filter again 【Ctrl】+【F】
Retreat the effect of the last filter made [Ctrl]+[Shift]+[F]
Repeat the filter made last time (adjustable parameters) [Ctrl]+[Alt]+[F]
Selection tool (in the “3D change” filter) [V]
Cube tool (in the “3D change” filter) [M]
Sphere tool (in the “3D change” filter) 【N】
Cylinder tool (in the “3D change” filter) [C]
Trackball (in the “3D change” filter) 【R】
Panoramic camera tool (in the “3D change” filter) 【E】
7. View operation
Display color channel 【Ctrl】+【~】
Display monochrome channel 【Ctrl】+【number】
Display composite channel 【~】
Preview in CMYK mode (switch) [Ctrl]+[Y]
Turn on/off the color gamut warning [Ctrl]+[Shift]+[Y]
Enlarge view 【Ctrl】+【+】
Zoom out the view 【Ctrl】+【-】
Full canvas display 【Ctrl】+【0】
Actual pixel display 【Ctrl】+【Alt】+【0】
Scroll up one screen 【PageUp】
Scroll down one screen 【PageDown】
Scroll one screen to the left 【Ctrl】+【PageUp】
Scroll one screen to the right 【Ctrl】+【PageDown】
Scroll up 10 units 【Shift】+【PageUp】
Scroll down 10 units 【Shift】+【PageDown】
Scroll 10 units to the left 【Shift】+【Ctrl】+【PageUp】
Scroll 10 units to the right 【Shift】+【Ctrl】+【PageDown】
Move the view to the upper left corner 【Home】
Move the view to the lower right corner 【End】
Show/hide selection area 【Ctrl】+【H】
Show/hide path 【Ctrl】+【Shift】+【H】
Show/hide ruler 【Ctrl】+【R】
Show/hide reference line 【Ctrl】+【;】
Show/hide grid 【Ctrl】+【”】
Close to the reference line 【Ctrl】+【Shift】+【;】
Lock reference line 【Ctrl】+【Alt】+【;】
Snap to grid 【Ctrl】+【Shift】+【”】
Show/hide the “Pen” panel 【F5】
Show/hide the “Color” panel 【F6】
Show/hide the “Layer” panel 【F7】
Show/hide the “Information” panel 【F8】
Show/hide the “Action” panel 【F9】
Show/hide all command panels 【TAB】
Show or hide all palettes except the toolbox 【Shift】+【TAB】
8. Word processing (in the “text tool” dialog box)
Left align or top align 【Ctrl】+【Shift】+【L】
Center alignment 【Ctrl】+【Shift】+【C】
Align right or bottom
【Ctrl】+【Shift】+【R】
Left/right select 1 character 【Shift】+【←】/【→】
Down/Up select 1 line 【Shift】+【↑】/【↓】
Select all characters 【Ctrl】+【A】
Select the character from the insertion point to the mouse click point [Shift] plus click
Move 1 character left/right 【←】/【→】
Move down/up by 1 line 【↑】/【↓】
Move 1 word left/right 【Ctrl】+【←】/【→】
Decrease the text size of the selected text by 2 pixels 【Ctrl】+【Shift】+【<】
Increase the text size of the selected text by 2 pixels 【Ctrl】+【Shift】+【>】
Decrease the text size of the selected text by 10 pixels 【Ctrl】+【Alt】+【Shift】+【<】
Increase the text size of the selected text by 10 pixels 【Ctrl】+【Alt】+【Shift】+【>】
Decrease the line spacing by 2 pixels 【Alt】+【↓】
Increase the line spacing by 2 pixels 【Alt】+【↑】
Reduce the baseline shift by 2 pixels 【Shift】+【Alt】+【↓】
Increase the baseline shift by 2 pixels 【Shift】+【Alt】+【↑】
Decrease kerning fine adjustment or kerning adjustment by 20/1000ems 【Alt】+【←】
Increase kerning fine adjustment or kerning adjustment by 20/1000ems 【Alt】+【→】
Decrease kerning fine adjustment or kerning adjustment by 100/1000ems [Ctrl]+[Alt]+[←]
Increase kerning fine adjustment or kerning adjustment by 100/1000ems [Ctrl]+[Alt]+[→]
Switch layer mode 【shift】+【 + 】or 【-】…
Double-click the panel=Open file
ctrl+double-click the panel=New file
shift+double-click the panel=Save
alt+double-click the panel=Open as
ctrl+shift+=Save as
ctrl+alt+o= actual pixel display
ctrl+h=Hide selected area
ctrl+d=Cancel selected area
ctrl+w=Close file
ctrl+q=Quit Photoshop
F=Standard display mode→Full screen display mode with menu→Full screen display mode
Press Tab to show or hide the toolbox and palette, and press “Shift+Tab” to show or hide other palettes except the toolbox.
ESC=Cancel operation
9. Other
When using other tools, hold down the Ctrl key to switch to the function of the Move tool (except when the Hand tool is selected); hold down the space bar to switch to the function of the Hand tool.
When using other tools, press “Ctrl+Spacebar” to switch to the Zoom In tool to enlarge the image display ratio: press “Alt+Ctrl+Spacebar” to switch to the Zoom Out tool to reduce the image display ratio.
Pressing the “Ctrl+[+]” key can make the image file continue to zoom in the display ratio, but the window does not enlarge with it; pressing the “Ctrl+[-]” key can make the image file continue to reduce the display ratio, but the window does not shrink accordingly.
Pressing “Ctrl+Alt+[+]” key can make the image file continue to zoom in the display ratio and the window will enlarge accordingly; pressing “Ctrl+Alt+[-]” key can make the image file continue to reduce the display ratio and the window will shrink accordingly.
Double-click the mouse on the Hand tool to display the image to match the size of the window.
Press “Ctrl+Alt+[number key 0]” or double-click the mouse on the Zoom tool to display the image file in a ratio of 1:1.
Press the “Shift+Backspace” key to directly call the Fill dialog box.
Press “Alt+Backspace(delete)” key to fill the foreground color into the marquee, press “Ctrl+Backspace(delete)” key to fill the background color into the marquee
On the Layers, Channels, and Paths palettes, press Alt and click the tool icons at the bottom of these palettes. For tools with dialog boxes, the corresponding dialog boxes can be called to change the settings.
When moving layers and marquee, hold down the Shift key to move horizontally, vertically or at a 45 degree angle, press the arrow keys on the keyboard to move each lpixel, hold down the Shift key and press the arrow keys on the keyboard to move Make every 10pixel movement.
When using the selection tool, press the Shift key and drag the mouse to increase the selection range (open set) outside the original marquee; press the Alt key and drag the mouse to delete the selection range that overlaps the original marquee; simultaneously press the Shift and Alt keys to drag Move the mouse to select the overlapping range (intersection) with the original marquee.
When calling the Curves dialog box, hold down the Alt key and click within the grid to increase the grid lines and improve the accuracy of the curve.
After changing the settings of a certain dialog box, if you want to restore the default values, just hold down the Alt key, the Cancel key will become the Reset key, just click on the Reset key.
To copy an image on a certain layer to the center of an image window of different sizes, you can hold down the Shift key while dragging the mouse, and the image will be automatically centered after being dragged to the destination window.
If you want to use the image for network transmission, you can set the image mode to Indexed Color, which has the advantages of small files and fast transmission. If you choose GIF89a Export (GIF output), you can set the transparent effect and save the file. Save it in GIF format.
When using the Free Transform (Layer/Free Transform) function, press the Ctrl key and drag a control point to adjust the deformation at will; “Shift+Ctrl” key and drag a control point to adjust the tilt; press Alt Press and drag a control point to adjust symmetry; press “Shift+Ctrl+Alt” and drag a control point to adjust the perspective effect.
On the layers palette, hold down Ctrl and click a layer with the mouse to load the image of that layer as a marquee (except for the Background layer, which can be renamed).
Several skills when using the Path tool: When using the Pen tool to make a path, hold down the Shift key to force the path or direction line to be at a horizontal, vertical or 45 degree angle, hold down the Ctrl key to temporarily switch to path selection Tool, hold down the Alt key and click the pen cursor on the black node to change the direction of the direction line, so that the curve can be turned; press the Alt key and click the path with the Direct Selection tool to select the entire path; to select at the same time Multiple paths can be pressed and clicked one by one after pressing Shift; when using the path selection tool, hold down the “Ctrl+Alt” key to move closer to the path, and it will switch to the plus and minus pen tool.
To switch whether the path is displayed or not, you can hold down the Shift key and click on the path bar of the path palette, or click in the gray area of the path palette.
If you want to execute several macros (Action) together, you can add a macro first, and then record each macro to be executed.
If you want to add a new command after a certain command in a macro (Action), you can select the command first, then click the Begin recording icon on the palette, select the command you want to add, and then click Just stop recording (Stop recording) icon.
When using the Filter/Render/Clouds filter, if you want to produce more obvious branch patterns, you can first hold down the Alt key and then execute this command; if you want to generate a low-diffusion support color effect, you can hold down the Shift key first Then execute the command.
When using the Filter/Render/Lighting Effects filter, if you want to copy the light source in the dialog box, you can first hold down the Alt key and then drag the light source to achieve the copy.
If you want to switch the color mode directly on the Color palette, you can hold down the Shift key, and then move the cursor to the color bar and click.
Please indicate:Free Editor Online Photoshop » Commonly used shortcut keys for online Image Editor! Collect decisively


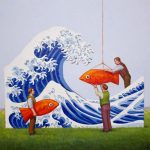
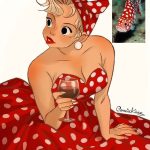
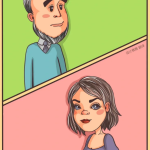 Gender Double Label Revealed 9 Illustrations Reveal the Invisible Rules Around Us!
Login to comment! If you already have an account, please first log in,No please registered or