

1. Eraser Tool
Eraser tool, more often than not, seems to have nothing to do with “matting”. However, it can play the role of “erasing”, so it can be used for matting. Its keyboard shortcut is: simply press a letter key “e”, and roughly erase the background or other parts of the screen you don’t want.
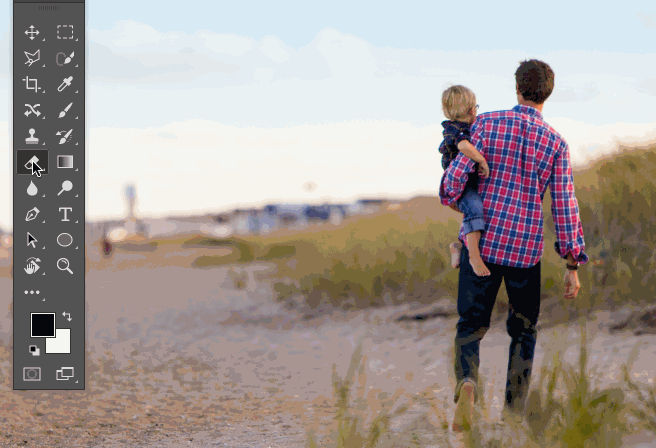
Eraser tool is easy to use, choose it, adjust the brush size and hardness can start to wipe. However, the disadvantages are obvious, it is difficult to achieve fine matting, the edge of the processing is not very good, and erase it is really gone, the original image is destroyed. A Suijun doesn’t recommend it here. It’s just for understanding. If it’s combined with “layer mask”, the effect is good. I’ll talk about it in detail later.
2. Magic wand tool
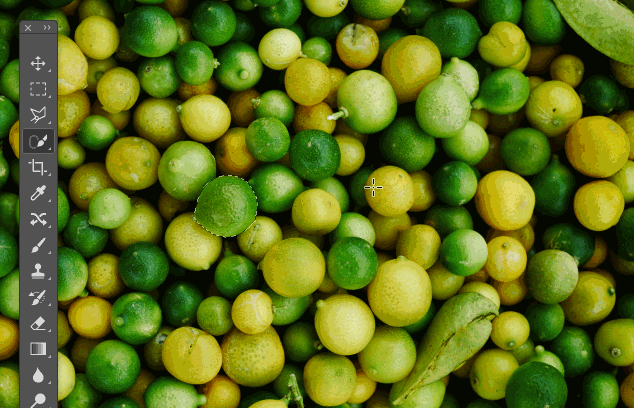
In images with obvious contrast, such as when the background is a typical solid color, the “magic wand” tool is very easy to use. You can select the background and delete it. Magic wand tool and quick selection tool are a group of tools. The shortcut key is w. you can also select them directly with the mouse, as shown in the figure below. Of course, when selecting, the magic wand tool supports deleting multiple selected parts and adding less selected parts. The methods are point, point and point. (learn more PS knowledge plus Q group: 760610867, take you to learn!)
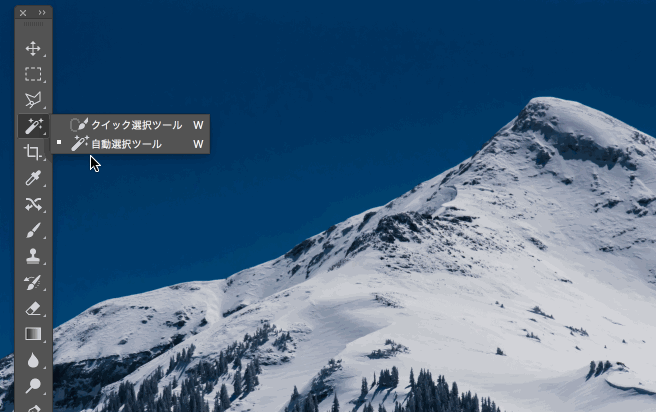
3. Quick selection tool
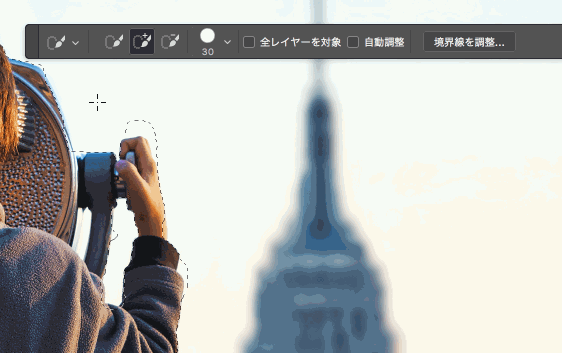
“Quick selection tool”, as the name suggests, is to quickly select the part you want or don’t want in the screen, select the tool directly with the mouse through the toolbar, or use the shortcut key “W” to align with the frame selection of the screen. At the same time, you can use the bracket “[” or “]” to scale the brush size, more accurate frame selection, as shown in the following figure:
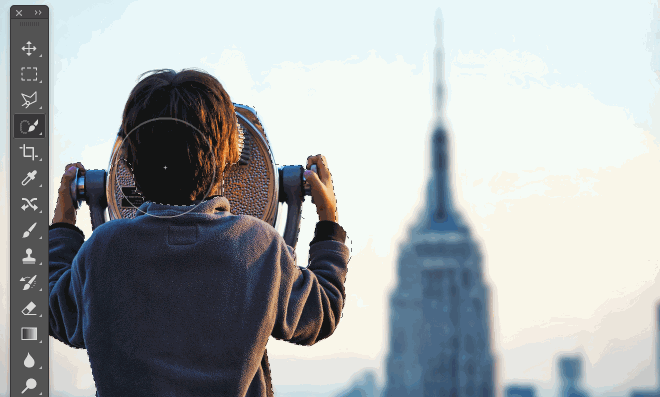
Quick selection tool, i.e. draw the selection with a brush
If the initial frame selection range exceeds the desired screen range, you can hold down the ALT key and select the part beyond the frame selection to subtract them from the selected area, as shown in the following figure:
Delta + Alt is subtracted from the selection
If there are still unselected parts after the preliminary box selection, you can hold down the shift key and select the parts to be added to the selection, as shown in the following figure:
Add to the selection by pressing △ + shift
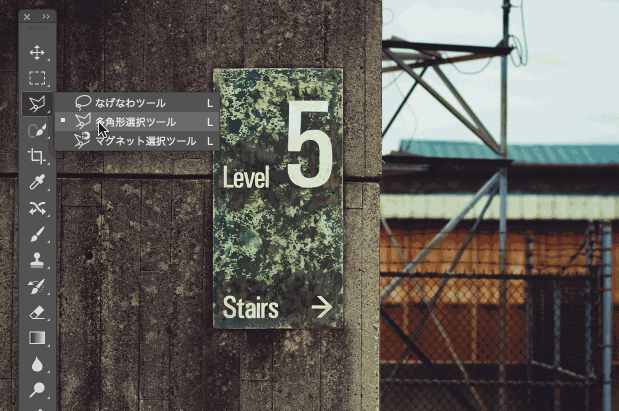
4. Polygonal Lasso Tool
As the name suggests, “Polygonal Lasso Tool” is a sharp tool for geometric polygons composed of straight lines in the screen. In the lasso tool group of the toolbar, after selecting, you can “select” along the edge of the polygon in the screen. While holding down the shift key, you can pull out 45 ° or 90 ° regular straight lines, which is convenient for selecting regular polygons such as squares or triangles As shown in the figure below:
Delta pick this shape, formal Polygonal Lasso tool is good at
PS: when selecting a non-linear contour, you can try to use the “magnetic lasso tool”. PS will let it spontaneously fit the contour to make a selection, provided that there is a strong contrast between the contour and the background.
5. Tool pen
Compared with the Polygonal Lasso tool, which can only draw straight lines for selection, the pen tool is invincible. Straight lines and smooth curves are its masterpieces. It can draw paths according to contours. Strictly speaking, the precision of using it to make constituencies is high enough. However, the reason why Samsung rating is given is mainly due to the score of “ease of use index”. The introduction and proficiency of pen need a lot of practice to master, and the operation difficulty is higher than other tools.
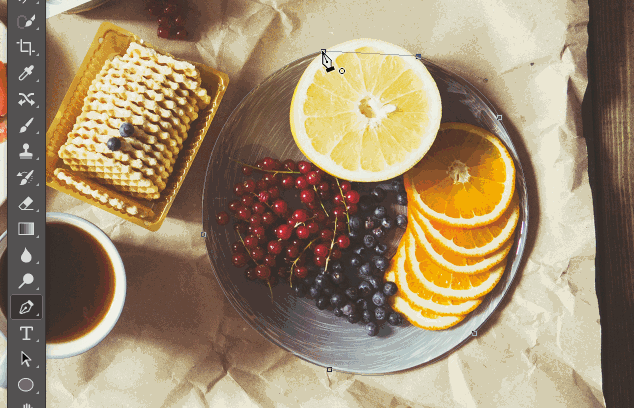
The pen tool is the best at drawing smooth curve path for selection
After drawing the path with “pen path”, just go to the “path” panel, rename the path as needed, and then press and hold Ctrl while clicking the path layer to create the selection, as shown in the following figure:
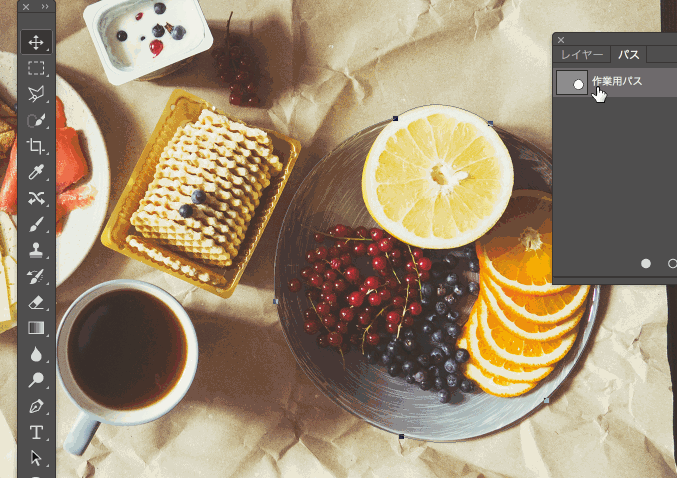
The selection can be made by △ Ctrl + clicking the path
6. The way is good
It’s the best choice to use the channel to select the area and cut the back. It’s simple, convenient and easy to handle such difficult materials as hair, trees, flowers, transparency and translucency. The first step is to go to the channel panel, observe the red, green and blue channels, select the channel with the strongest black-and-white contrast, and copy the channel. PS: if you want to keep transparent information, you should choose the best channel of gray information to copy. As shown in the figure below, the operation of picking a female model with thick hair is an example
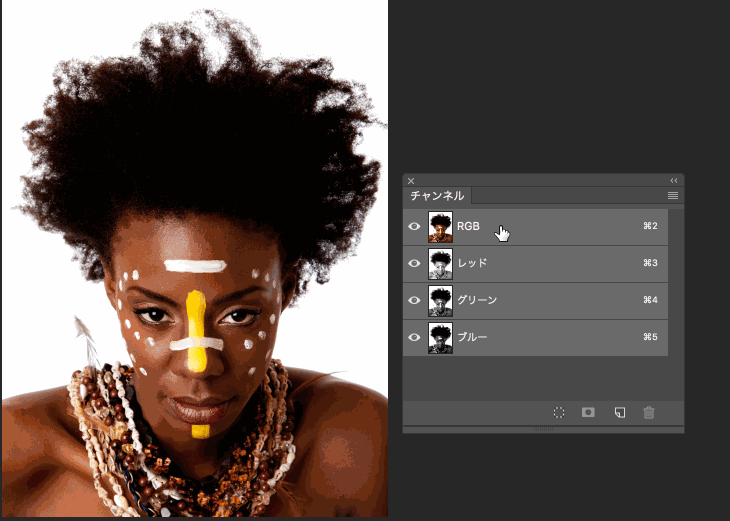
Δ copy the channel with the strongest black-and-white contrast
After selecting the copied channel, select “image & gt; adjust & gt; color scale” in the menu bar or press the shortcut key “Ctrl + L” to call up the color scale panel and add the black and white contrast of the channel to make the contrast more prominent, as shown in the following figure:
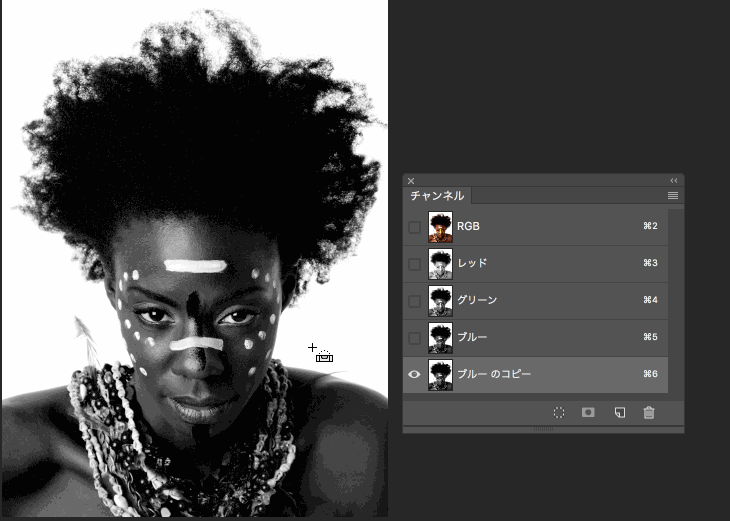
Delta Ctrl + L, increase the black and white contrast on the color level panel
At this time, we can choose the brush tool, set it to black, and then draw on the model, black her, so that she can achieve the highest contrast with the white background, as shown in the following figure:
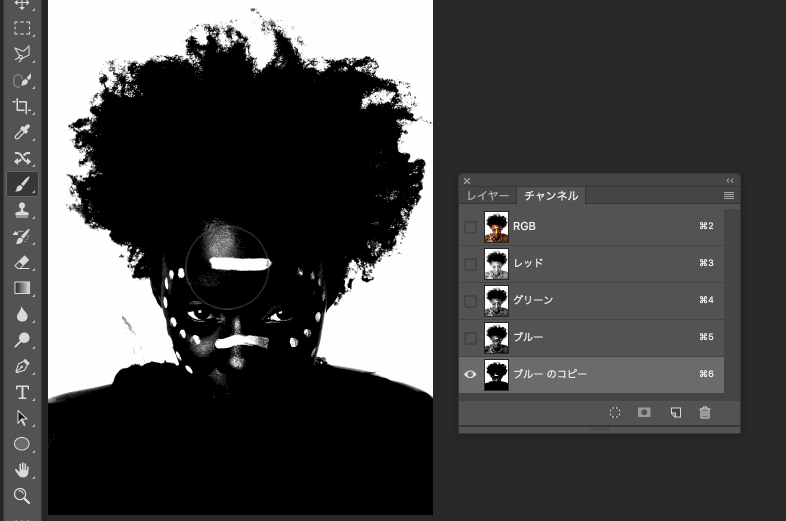
Color all the models black
At this point, you can press and hold Ctrl + to click the channel, select the white background, and then click RGB channel to return to the layer panel, and click Delete to delete the background.
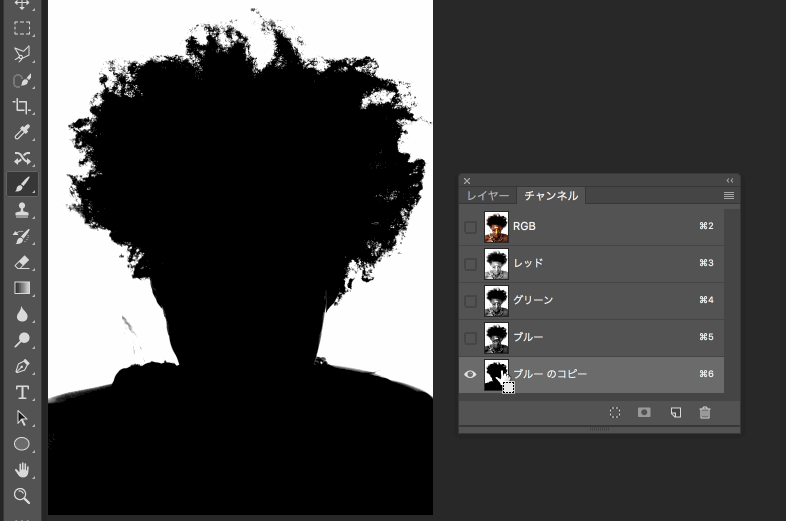
Then the background constituency is made.
In this way, we can get a picture of the model with a transparent background and feel the edge of the hair part.
Delete the background, feel the model hair edge effect, Bang Bang Da (learn more PS knowledge plus Q group: 760610867, take you to learn!)
7. Color range
If the background of the screen is a solid color, we can also use “color range”. Under the “select” menu in the menu bar, the operation is as shown in the figure below, which is also very convenient
After the gamut is specified, one click selection is very convenient
If the image to be retouched has a very clear focus, you can also use the “focus area” function under the selection menu.
8. Layer mask
The biggest advantage of “layer mask” is that it doesn’t damage the original image. You just need to add layer mask to the image, and then select the brush tool. The black brush is occlusion, and the white brush is exposure. In other words, the place smeared with a black brush will be erased. Using this method, you can complete the work of matting and back removal. The operation is shown in the figure below
The mask method is good, cover where wipe where remove
9. Clip mask
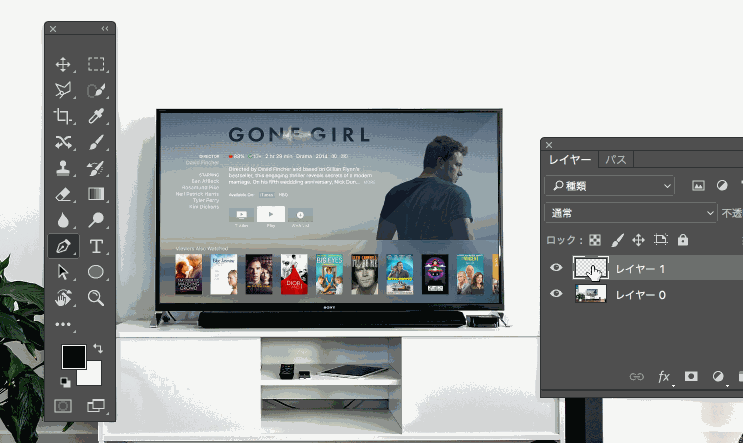
The working principle of “clip mask” is that the upper layer is filled into the lower layer. It’s a slightly tortuous matting method. The advantage is that it can be applied to multiple layers and used many times without damaging the original image. It’s also good to make multiple images with one click. Of course, it may not be used much, but when making mockup, you can feel more convenience of this method. For example, let’s take the following picture as an example to extract the screen part of the TV. First, we use the pen tool to draw its outline

First, draw the path with pen tool
Open the path panel, hold down the CTRL key and click the path thumbnail to turn the path into a selection, that is, select the screen, as shown in the following figure:
Delta path to constituency
The selection is selected. Go back to the “layers panel”, click the “create new layer” button in the lower right corner, and then set the foreground color to black. First, press Ctrl + Alt + I to invert the selection, and then press the shortcut key “Alt + delete” to fill the new layer with black. At this time, the screen is black except for the TV screen. As shown in the figure below:
New layer, reverse selection, fill in black
We move the layer filled with black to the bottom, then select the original image and set the clipping mask for it. At this time, we can see that the screen has been gouged out.
Make a clip mask
10. Adjust the edge
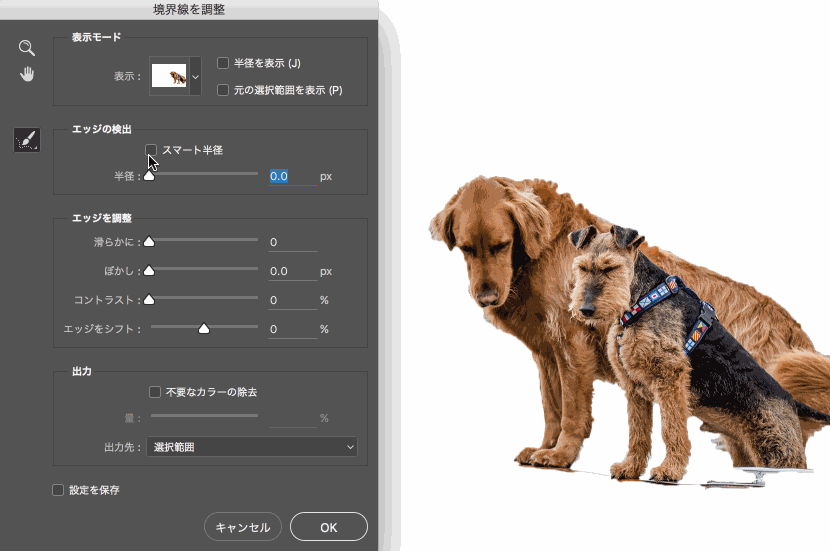
Although the “channel matting” method can remove the hair and other complex edges, when the background is also more complex, the channel method is a bit “poor”. In this case, we need to use the ultimate trick “adjust the edge”. In fact, any selection tool, such as magic wand tool, polygonal lasso tool, pen tool, etc., can be used with the “adjust edge” panel. Let’s take Wang Xing in the figure below as an example to feel the power and omnipotence of “edge adjustment”.

How to select Wang Xingren?
First of all, use your favorite selection tool, such as the “quick selection tool” box to select Wang Xingren, as shown in the figure below. Don’t worry too much about the fineness of the edge contour.

Delta roughly select Wang Xingren first, as shown in the ant line above
After box selection, you can click the “adjust edge” button on the tool options bar under the menu bar to activate the panel. As shown in the figure below, it can be found that there are many parameters to set. Check “intelligent radius” and set it at the appropriate value through parameter adjustment. PS: in the version of CC 2015.5, pressing the button has been updated to “select and mask” function.
Check “smart radius” and set appropriate parameters
When setting the “smart radius” parameter, we can check the “show edge” button, and then only show the edge clearly, which is more conducive to us to view the fine effect of the edge. The shortcut key “J” is used to switch the “show edge” or not, as shown in the following figure: (learn more PS knowledge plus Q group: 760610867, take you to learn!)
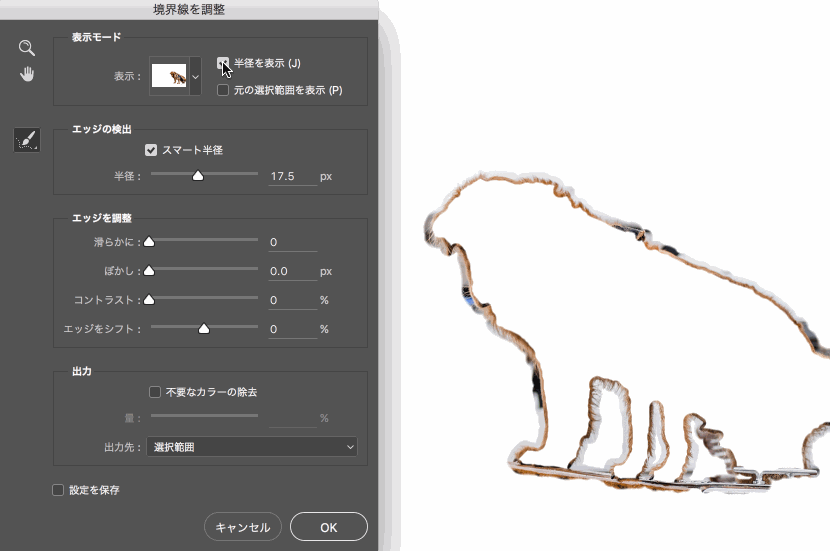
Display the edge, which is more conducive to adjust the intelligent radius
When processing the edge contour, you can also select the “radius adjustment tool” on the left side of the panel to directly smear on the edge to remove the noise and make the edge clearer, as shown in the following figure:
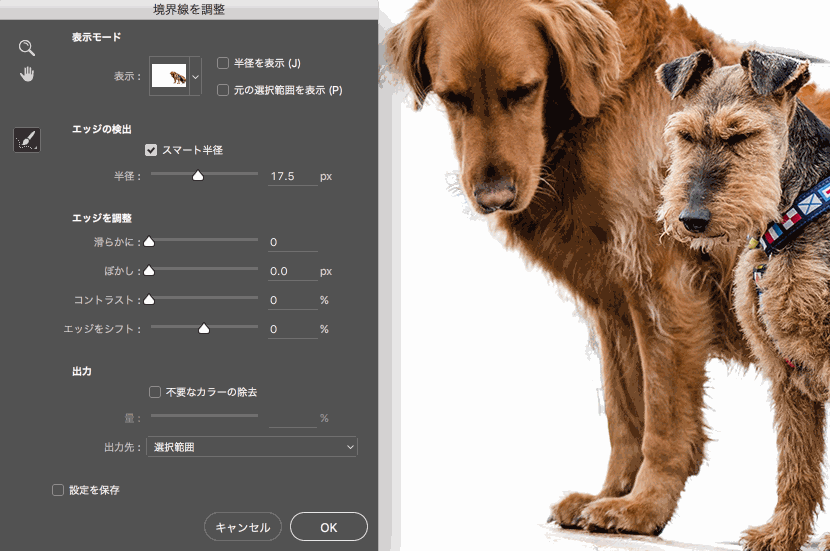
Δ processing edge, using “adjust radius tool”
In the middle of Wang Xingren’s legs, you can also choose the “erasing and adjusting tool” on the left to smear directly on the middle of the legs to make the selection of the leg hair clearer and more accurate, as shown in the following figure:
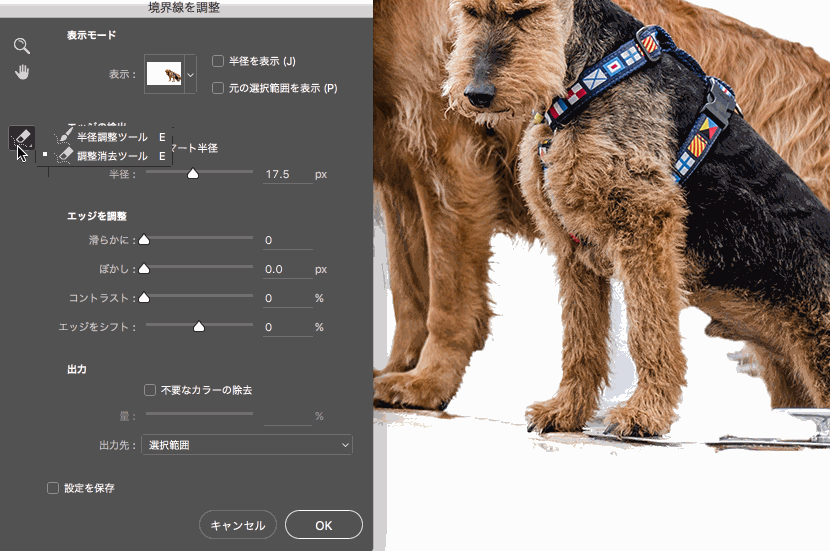
Fine tuning by “erasing adjustment tools”
The view mode option on the upper side of the adjust edges panel
Please indicate:Free Editor Online Photoshop » Is it difficult to cut out? nonexistent! Master the basic meaning of cutouts, and easily deal with all cutouts!


 Gender Double Label Revealed 9 Illustrations Reveal the Invisible Rules Around Us!

Login to comment! If you already have an account, please first log in,No please registered or